Chances are, if you have a mailbox, it is filled to the brim every day with direct mail credit card offers. Or maybe you have a few expired gift cards laying around. You have probably heard that these and other retired credit cards can be put to use in the ceramics studio as throwing ribs.
But today, ceramic artist Daryl Baird presents another great use for these throw-away items: custom clay extruder dies! Way to go Daryl!
Personalize Your Extrusions with Custom Clay Extruder Dies
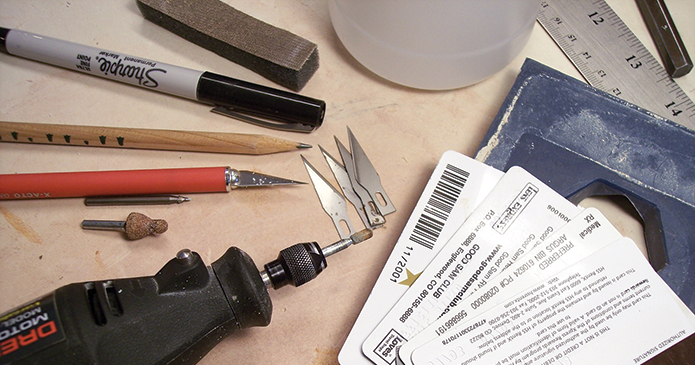
What You’ll Need to Make Clay Extruder Dies:
- Number 2 pencil
- Indelible marker with a fine point
- Dremel tool and assorted bits
- X-Acto knife and several No. 11 blades
- Emory cloth or 150-grit sandpaper
- Rubbing alcohol and a small rag
Safety glasses or goggles are essential when using the Dremel tool. Optional tools include a hand drill and bits, a scroll saw, a jeweler’s saw and a small vise.
The Process
To begin, use a No. 2 pencil with a good eraser to lay out the shape of the extruder die opening. Dull the finish of the card with fine sandpaper if the pencil marks are too light. Go over the pencil drawing with a fine-point, indelible marker, like a Sharpie (figure 1). If you make a mistake, these lines can be removed by wiping the card with a rag dipped in rubbing alcohol.
To cut out the shape you’ve drawn, a hand-held rotary tool, like the type made by Dremel, works fast (figure 2) and is fairly easy to control. These come with a variety of drill bits, along with grinding and sanding bits that can be used to refine the shape of the opening.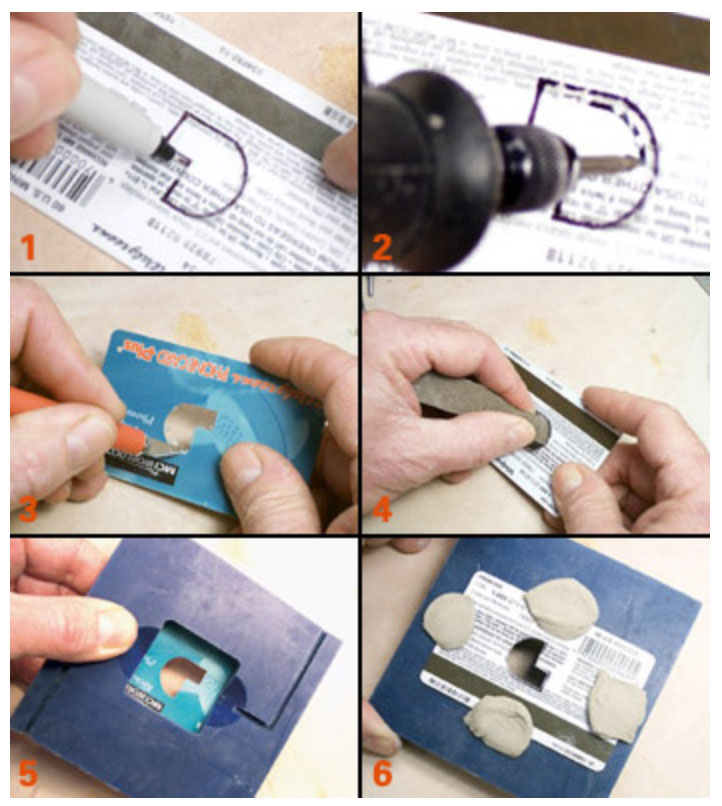
In addition to using a Dremel tool, I tried cutting out the die shapes with a scroll saw. It worked well, but setting up the saw for this was tedious and time-consuming. I also gave a coping saw and a jeweler’s saw a try. Even with a fine-toothed blade installed, the coping saw was next to impossible to use. The jeweler’s saw cut more smoothly but it was slower than using a Dremel tool.
Once the opening has been cut out with the Dremel tool, it will be rough, so you’ll need to clean it up. I like using an X-Acto knife with a No. 11 blade to clean up the opening and square-up the corners (figure 3). The blades are very sharp but they dull quickly when cutting plastic. Have several on hand and change blades often.
Once you’re satisfied with the die shape, use a small piece of sandpaper or emory cloth to clean off any burrs (figure 4). I used a narrow strip cut from a foam-backed sanding pad because of the way it fits the contours and corners.
Using Your Custom Clay Extruder Dies

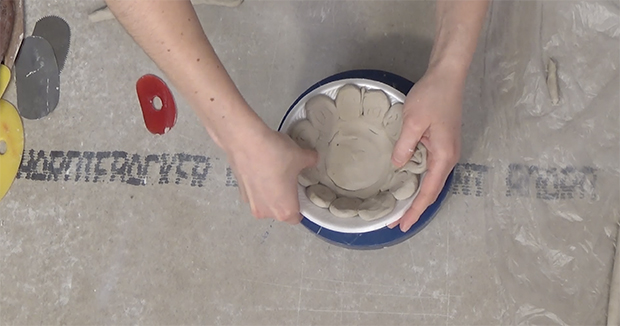
Credit card clay extruder dies are best suited for use with extruders that have a 3 to 4-inch barrel. Don’t try to use credit card dies in large-barreled extruders because these types of extruders will exert too much pressure on the die, and cause it to crack. For the same reason, you’ll achieve the best results by using only a two or three pound charge of very soft, well-wedged clay in the extruder to minimize the stress placed on the die. Place the card on a clay extruder die with a hole somewhat larger than the hole you just cut. I’m using a North Star standard extruder and the outer part of a small hollow die makes an ideal mounting plate for the credit card die. Looking from the underside, make sure the die is centered (figure 5).
Hold the die in place and turn it face up. Use small wads of soft clay to anchor the credit card to the mounting plate (figure 6). Then, attach the die to the extruder barrel and load the charge of clay into the barrel carefully so the credit card does not become misaligned. Evaluate the first extrusion. If areas need to be refined, it’s easy to go back and give the shape a little “tune up.”