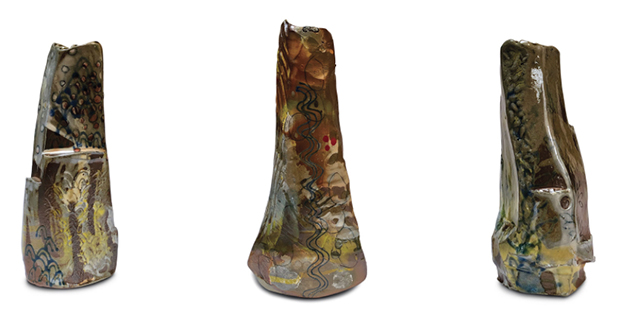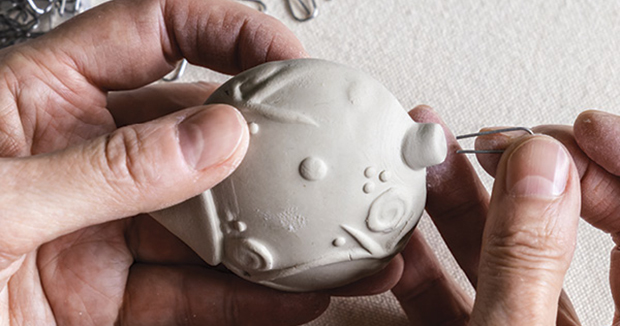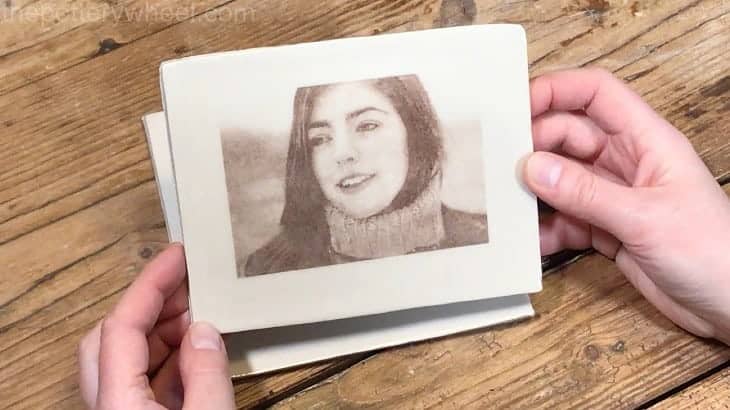
There are various methods of image transfer onto clay. However, if you specifically want to transfer photographs onto clay, there is a simple technique that works extremely well. This guide will take you through the process step by step.
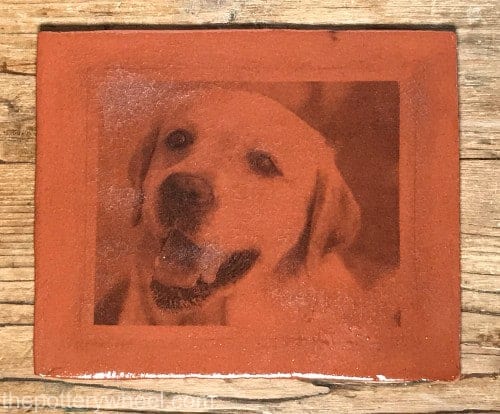
I used the following process to transfer this image onto a clay slab box.
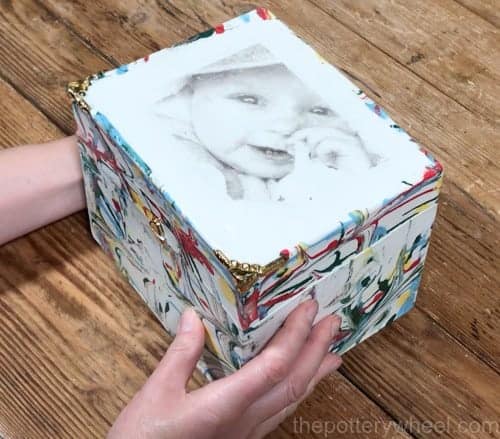
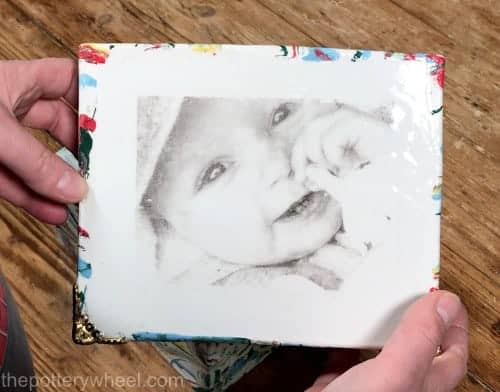
To create your own photographic transfers onto pottery clay you will need the following:
Steps to Transfer an Image onto Clay
The first thing that you need to do is to make a suspension using a combination of the ceramic stain and linseed oil.
Step 1) Mixing the Stain/Oil Suspension
A well-known brand of ceramic stains is Mason stains. If you can’t get hold of Mason stains, most other brands of ceramic stains will be fine. I use an unbranded type of ceramic stain from my local pottery store, and it works fine.
I don’t weigh the quantities, instead, I use a scoop and will add 3 scoops of stain to my mixing container. And then add 2 scoops of linseed oil to the stain.
I’ve tried different ratios of stain to oil, and I find this 3:2 ratio works well. I think that’s because the concentration of stain is relatively high, creating a nice impression.
Once the stain and oil are in the container, I give it a good stir with a spoon.
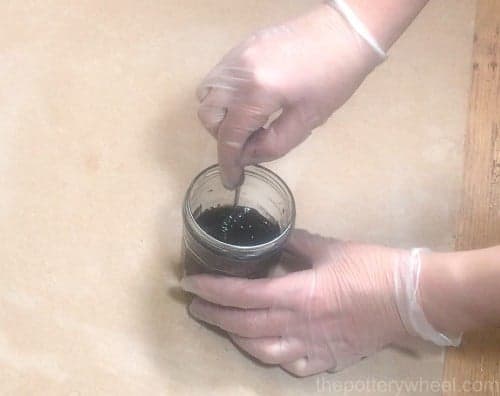
Then I put a lid on the container to stop any bits or debris from falling into the pot. The mixture then needs to be left for 3 or 4 days to percolate and for any lumps of stain to dissolve.
Tip
This oil/stain suspension can be made using different colored stains. The boldness of the image depends on the color of the stain that you use. However, I’ve found that dark-colored stains like dark blue and brown can work nicely.
Step 2) Preparing the Image to Transfer onto Clay
First, you need to choose the image that you want to transfer. Images with quite high contrast between the dark and light areas work well.
I sometimes adjust the image to increase the contrast. I do this using a free-to-use photo editing tool called Pixlr. You may have your own preferred photo editing software. However, if you don’t then head on over to the Pixlr site here.
Once you’ve uploaded your photo, you can crop it to the size that you want. And you can also adjust the image to increase the contrast.
Before you print your image off, you need to do two other things:
- Flip the photo horizontally, so that you create a reversed mirror image. If you don’t reverse the image, it will transfer onto the clay in reverse. Sometimes this doesn’t matter, but you might find that your images look a bit strange to you if they haven’t been reversed.
- Adjust the photo so that it is set to greyscale.
Step 3) Printing the Pronto Plate on a Laser Printer
Once I’ve adjusted the images, I save them to my desktop. Then I transfer them to an A4 document. You can do this in a word document. It doesn’t have to be any kind of fancy software.
I have an A4 laser printer, and if I transfer the images to an A4 word document, I get a good visual idea of how big the images will be when they are printed off.
Important Tip!
It’s very important that you print off using a laser printer, rather than an inkjet printer. The ceramic stain will attach itself to a laser-printed image but this won’t work with an inkjet image. It doesn’t need to be an expensive printer, but it does need to be a laser printer.
Before I print onto the Pronto Plate, I always print the image off onto a piece of regular paper first. This gives me a good idea of what the picture will look like.
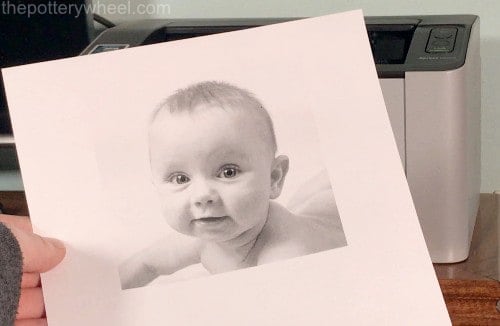
If you are going to make mistakes, it’s best to do them on regular paper first. For example, I have quite often forgotten to reverse the image. And it’s only when I print it off on regular paper that I notice it looks a bit strange.
This test run gives me a chance to go back and reverse the image before printing it off onto the Proto Plate.
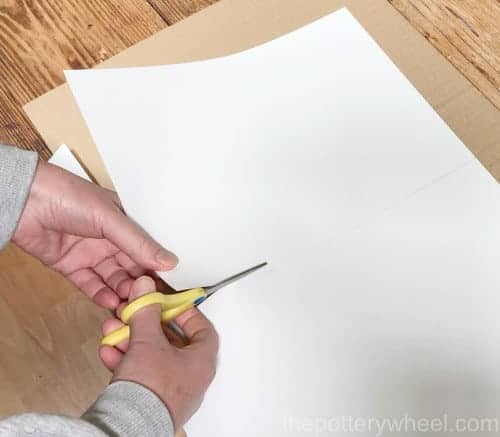
Once you are happy with the image, cut the pronto plate to the size that your printer will accept.
What Side to Print Onto?
There are different brands of litho plates. The makers of Pronto Plate say you can print your image on either side. I have found that some manufacturers recommend printing on one particular side.
Although they look the same on both sides, if you inspect some brands very carefully there is a slight difference. One side of the plate will have a very slight toothy feel to it. It feels a little bit like very fine sandpaper.
If you have bought a brand that recommends printing on a particular side you will probably need to run your finger over it very lightly to spot the difference, as they look the same.
Having said that, it’s best not to touch the plate with greasy fingers. Therefore, I tend to check it at the very edge of the plate, and I handle it as little as possible.
If you have bought a brand that recommends printing on a particular side, you need to print the image onto a slightly toothier side. So, make sure that you put the plate into the printer the correct way up. Once you are happy with everything so far, you can press print.
When I have printed off the image, I cut it out so that I’m only using the section of the plate that has the image on it. I make sure to leave a white margin around the image about ½ an inch wide. This just makes it easier to pick up later when it’s loaded with ceramic stain.
Step 4) Preparing Your Clay to Transfer the Image
This method of transferring photographs onto clay works best for smooth clay. It doesn’t need to be flat, you can transfer the image onto a curved surface, like the side of a mug.
However, the clay does need to be smooth. A textured or uneven surface would not produce a clear image.
I make my piece of pottery and allow it to become soft leather hard. Then just before I start loading the ceramic stain onto the pronto plate, I compress the area that I’m going to transfer the image onto with a rubber rib. This gets rid of any ridges or uneven areas on the clay surface.
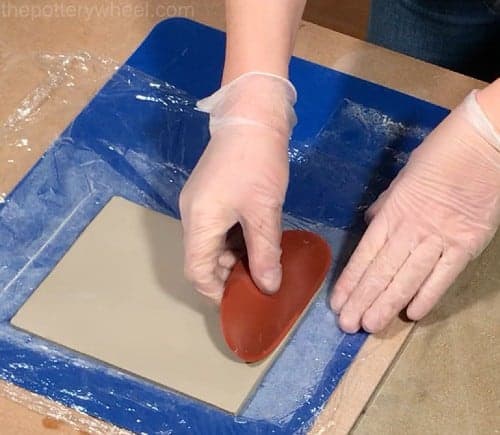
I’ve used this method of transferring images onto clay on different colored clays, including cream, white, buff, and red clays.
Step 5) Loading the Pronto Plates with Ceramic Stain
It’s important to wear rubber gloves during this process as it gets messy. The oil/stain mixture will inevitably get onto your fingers and hands. This will stain your hands, but also ceramic stains contain metals that you should avoid coming into direct contact with your skin.
Stir the suspension well as it separates out. Put a couple of spoonfuls of the suspension on one of the glass chopping boards.
Wipe the other glass chopping board with a damp sponge to make the glass a bit wet. This will help the pronto plate stick to the glass board. Place the pronto print on the damp glass board, with the printed image facing upwards towards you.
The roller that you are going to use is called a ‘brayer’. Roll your brayer in the stain/oil suspension and then gently roll the loaded brayer over the image on the pronto plate.
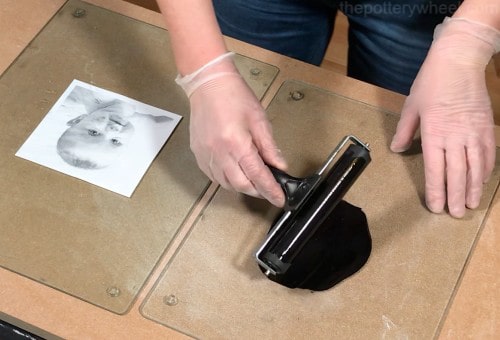
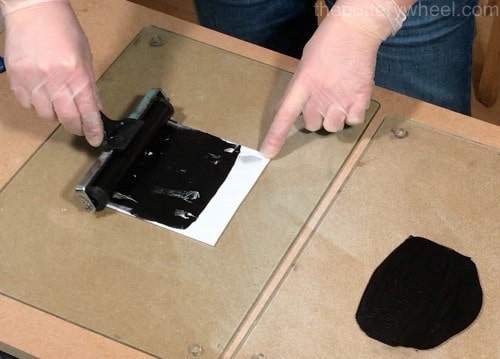
Roll the brayer carefully, particularly when you are rolling near the edges of the Pronto Plate. If you do it too quickly the pronto plate can stick to the brayer, and you can lift the Pronto Plate up off the glass.
Roll the stain/oil mix on the pronto plate until the image is covered with ceramic stain.
Step 6) Cleaning Up the Image Before You Transfer onto Clay
Take a sponge and dip it in water. Squeeze the sponge out so that it is damp rather than loaded with water. Start to dab the ceramic stain off the image. Rather than wiping the image, you are blotting the image to get rid of the excess stain.
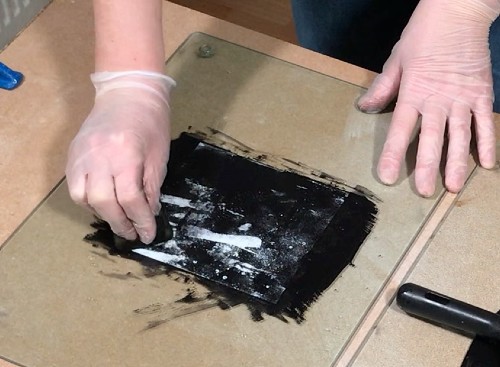
If your sponge is too dry, the blotting process can take a long time. If it’s taking too long, you can drip a little water onto the pronto plate to disperse the oil/stain mixture.
Keep blotting until you start to see the image showing through. By this point, your sponge will be covered in ceramic stain. It’s a good idea to start using a clean sponge to keep removing the excess stain.
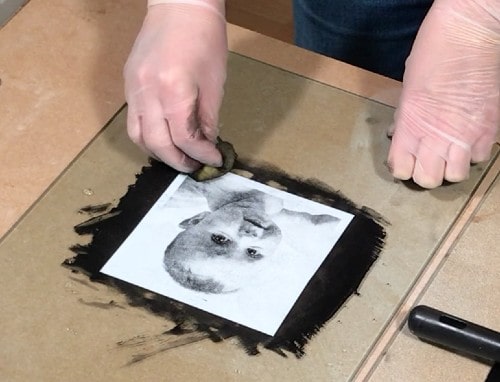
I have a set of about 6 sponges that are varying degrees of cleanliness. As the image starts to clean up, I switch to a new cleaner sponge so that I can continue to dab away the stain. If you keep blotting with a sponge that is soaked with the oil and stain mix, it’s hard to clean the plate up.
When the white or light parts of your photo are clearly visible, the image won’t look any different from what it looked like at the start. However, the ceramic stain has actually stuck to the dark laser image on the pronto plate.
Step 7) Repeating the Process
I repeat the process of rolling the stain and oil onto the image and then blot off the excess. I’ve found that going through the process 3 or 4 times will help you create a clearer picture when you transfer the image onto the clay.
After I’ve repeated the process 3 or 4 times, I clean up the edge of the pronto plate. The easiest way to tidy up the edge of the photo is to use a clean damp sponge.
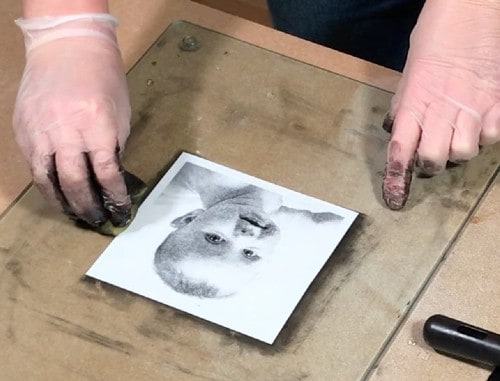
If the image is very wet, I sometimes gently place a piece of soft paper towel on the pronto plate.
I don’t dab or blot the image, I just let the towel rest briefly on the image to absorb really large beads of water. If you dab the image, you will lift the ceramic stain off the pronto plate, which would undo all the work you’ve just done.
Tip: Before I transfer the image onto the clay, I change my rubber gloves. This helps to prevent making ceramic stain fingerprints and smudges by accident whilst I’m working.
In fact, I usually change my gloves a few times during the whole process. The gloves get quite stained during the rolling and blotting process. I find it easier to avoid making messy mistakes on the clay if I keep my gloved hands and the working area as clean and tidy as possible.
Step 8) Placing the Pronto Plate on the Clay to Transfer the Image
Carefully lift the corner of the image up using your fingernail or a needle tool. Peel the pronto plate off the glass and hold the lithograph by the edges being careful not to touch the image.
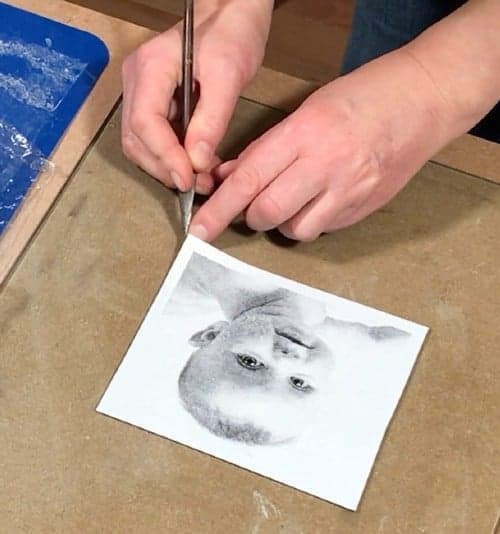
Turn the pronto plate over so that the image loaded with stain is facing your clay surface. Line the image up carefully before you apply it to the clay. Once the image is in contact with the clay, you can’t lift it off and reposition it.
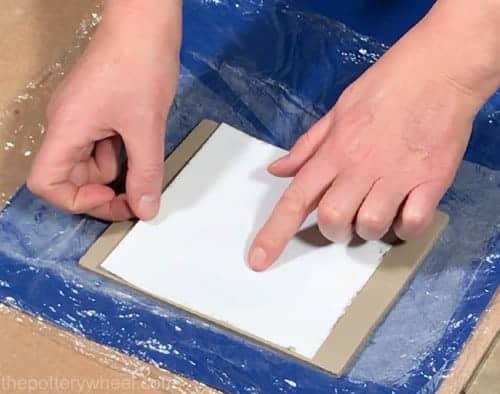
If you lift the plate off the clay, part of the image will already have transferred. So, repositioning it would transfer the image again to another part of the clay, making a bit of a mess. You only get one chance to get it in the right position!
Lower the image onto the clay and make sure it doesn’t move around on the clay once it’s in place.
Step 9) Cleaning Up the Back of the Litho Plate
You might find that some ceramic stain has leaked onto the back of the pronto plate. It’s a good idea to tidy this up so that it doesn’t transfer accidentally to your pottery and make a mess.
I find the easiest way to do this, is to take a clean damp sponge and wipe up the stain using an inwards swiping motion. This way you are wiping the stain up, but you are wiping it away from the surface of the clay.
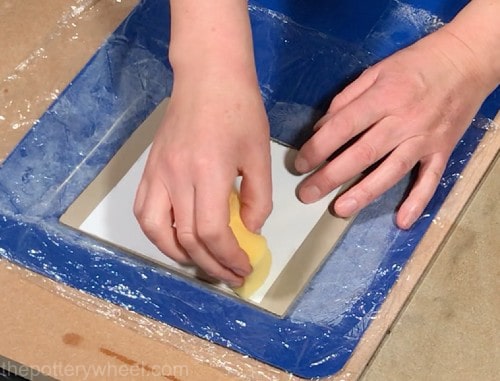
Once the back of the pronto plate is clean, I start applying some pressure to transfer this image. This is how I go about doing that…
Step 10) Transferring the Image onto the Clay
I run my finger and thumb over the back of the pronto plate to get rid of any air bubbles that might have been trapped between the clay and the image.
You now need to rub the back of the pronto plate so that the ceramic stain transfers fully to the clay.
I’ve seen some people rubbing the pronto plate with the back of a spoon, a bit like burnishing. However, I’ve found that this can make the image a bit streaky. Instead, I like to use a large flat platter tool.
I position the straight side of the platter tool up on one side of the image and then swipe it slowly but firmly across the back of the pronto plate. This creates an even pressure across the whole of the image and helps prevent a streaky effect.
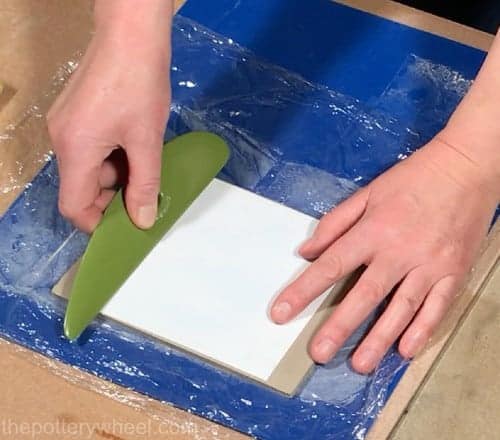
In addition to using the platter tool, I rub the back of the image with my fingertips. I do this to make sure that all areas of the image transfer onto the clay.
Carefully lift one corner of the pronto plate up and check to see if the image has been transferred clearly. If the corner looks good, I will carefully peel the plate off the clay.
Occasionally, small areas of the image may not have transferred completely. If the pronto plate hasn’t shifted, you can carefully lay it down on the clay again and rub the area where the image didn’t transfer.
Once you are happy that the image has transferred onto the clay, you can peel the pronto plate off completely.
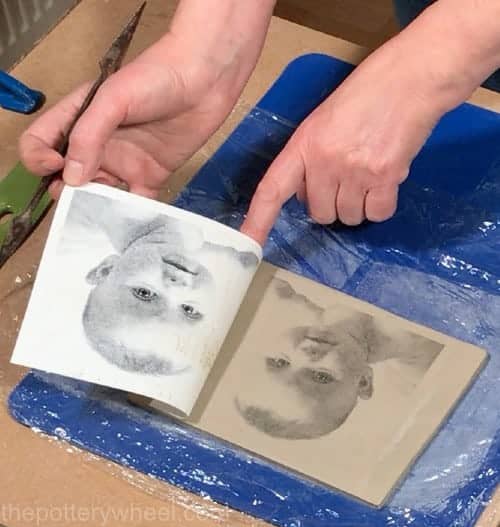
Step 11) Tidying Up the Image
You might find that some ceramic stain has collected around the edge of the pronto plate and that this has transferred onto your clay. It’s easy to clean this up. I simply take a damp sponge and carefully wipe away any ceramic stain that has been transferred by accident.
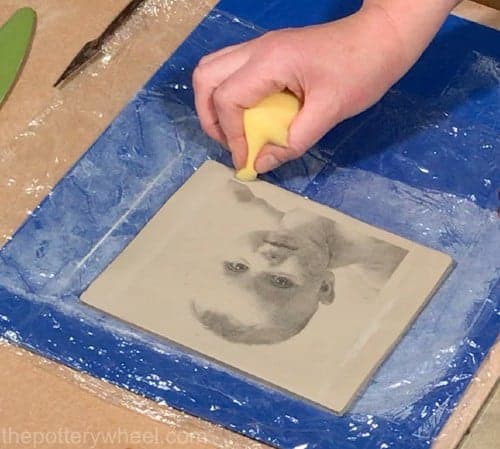
Step 12) Firing Your Image
Before the clay has been fired, the image is fragile and could be wiped off or become blurred easily. So be sure to avoid touching the image unnecessarily.
I bisque fire the pottery as usual. However, I do avoid stacking the greenware on top of the unfired image.
Because the image is fragile, stacking another piece of greenware on top may damage the image. And you would most likely transfer some of the stain from the image to the underside of the greenware that’s stacked on top.
Step 13) Glazing Your Image
You will probably find that even after bisque firing the clay, the image is still a little dusty and fragile. If you were to rub it with your finger the image would smudge.
Once the clay is bisque fired, I avoid touching the image as much as I can, and I also apply the glaze carefully too.
I usually brush the glaze on. When I apply the glaze, I load the brush up quite heavily and then I float the glaze onto the image with the brush.
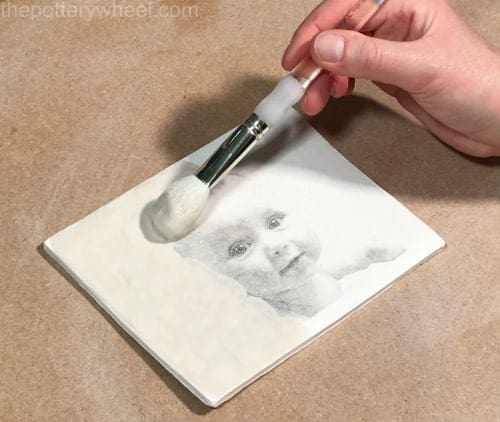
If I’m too heavy-handed or drag the glaze across the image, you can cause the loose ceramic stain to streak across the bisqueware. A good alternative is to spray your glaze onto the bisqueware to avoid any risk of streaking or smudging.
You might worry that the loose stain will bleed in the glaze. But I have found that as long as I use a relatively static glaze rather than a flowing glaze, the image will remain crisp.
Once the image has been glaze fired it can be handled and touched without any danger that the ceramic stain will smudge.
What Type of Image Works Best?
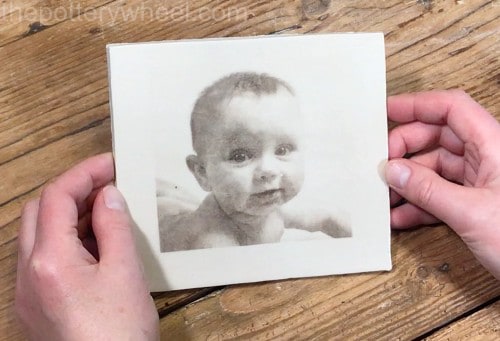
I have found that images that have a higher contrast work best with this process. If your photograph consists of lots of the same shades of grey or black, then the transferred image may not be very clear.
However, contrasting shades will create a good image on the clay.
The process works well with lighter photographs and darker photographs too. What seems to matter most is the degree of contrast in the picture.
Different Options When Glazing
This process works well when firing to cone 06 and cone 6. I haven’t tried it firing to cone 10, but it’s definitely okay for cone 6 stoneware temperatures.
If I’m firing at stoneware temperatures, I usually glaze with a clear brush on glaze like Amaco High Fire clear glaze.
I’ve tried using clear matt glazes too. I found that the matt glaze can go a bit milky and patchy, which obscures the image a bit.
However, it would be worth experimenting with different matt glazes to see if you get a better result. As it stands, I prefer the clear gloss glaze finish.
Transferring Images onto Clay with Different Colors
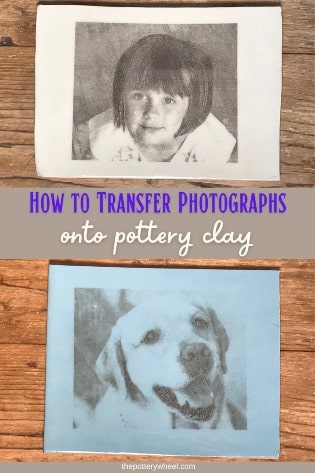
You can transfer an image onto clay using different color options too. For example, you can experiment with different colored stains. You don’t have to limit yourself to black ceramic stains.
I have found that this technique works with other colors too. For example, I created the following pieces using a range of colored stains.
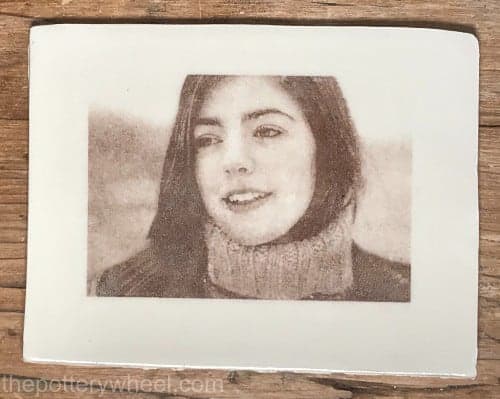
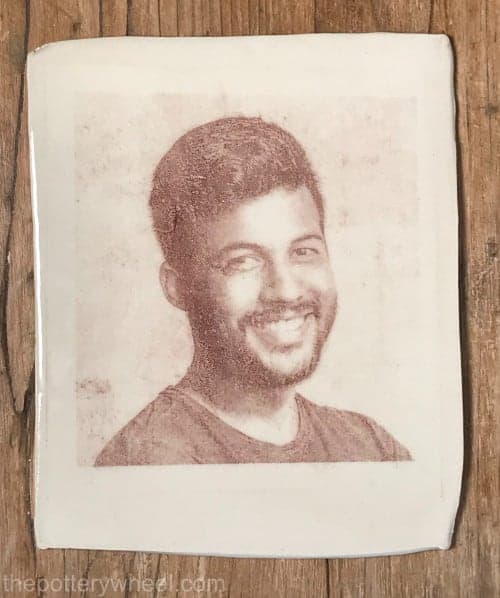
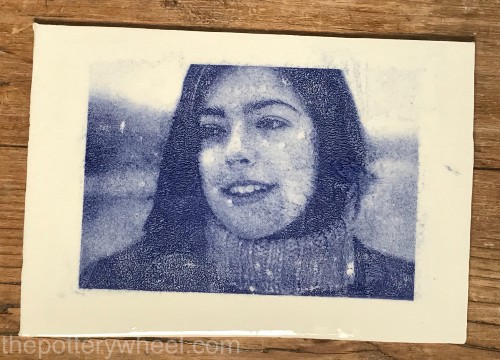
I think the process works better with darker-colored stains like black, blue, and brown, but you can test out other colors too and see what you like the look of.
You can also color the clay before you transfer the image to your piece. For example, you can decorate your clay with colored slip or underglaze and then apply the transfer to the colored clay.
I used slip and underglaze to color these two sample pieces before transferring the image.
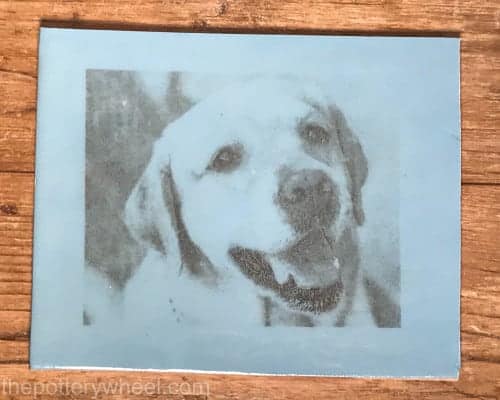
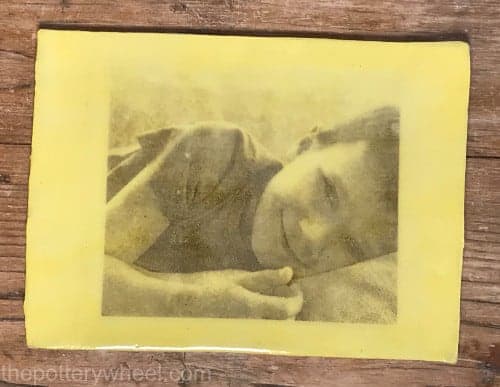
Alternatively, you can use different colored clay. The process works well on white and buff clay. But equally, you can achieve some striking results with red terracotta clay too.
You can watch a video of this process here if you like…
Final Thoughts
I’ve found that out of various ways to transfer an image onto clay, this method provides the clearest result. I like its versatility, and I like the fact that you can adjust the color of the clay and stain. I hope you found it helpful and that you can use it to create nice personalized pieces of pottery.
