How to Make DIY Vinyl Bats
I love how potters are so good at coming up with studio uses for waste materials. This resourcefulness saves countless items from ending up in the landfill, and helps save money to boot!
In today’s post, an excerpt from the May 2023 issue of Ceramics Monthly, Dan Ingersoll shares how he made use of leftover vinyl plank flooring from a recent home improvement project to make bats. The bats were easy-to-make, durable, and a fraction of the cost of new plastic bats. Way to go, Dan!
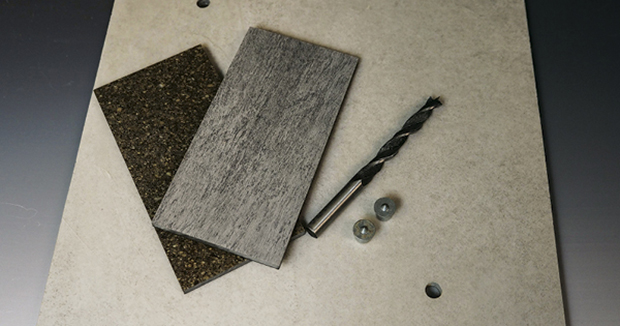
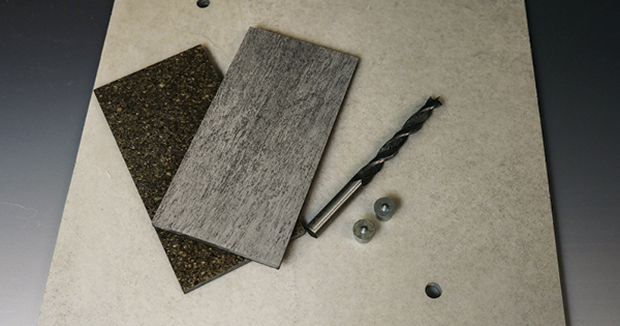
I recently put some new flooring in my home and used smooth-textured, click-together, luxury vinyl planks. Mine were 12 inches wide by 24 inches long, which is a common size. I decided to try using leftover pieces to make some bats. The result was a relatively thin (8mm thickness), strong, flat, waterproof, and durable bat comparable to the plastic bats that are commercially available. If you have access to a table saw and a drill press, you can make a bunch of bats in an hour or less. A jigsaw and a hand drill will work, too.


First, I set up my saw to remove the edges that are designed to click together and then I cut the planks in half to arrive at a 12×12-inch square bat. To add bat-pin holes, use a well-fitting bat that already has pin holes in it as a template. Pick up a couple of 3/8-inch dowel centers along with a 3/8-inch brad-point bit from the hardware store (1, 2). Insert the dowel centers into the holes on the existing bat with the points facing up (3). For perfect alignment every time, center your new bat over the bat with the pins in it and push down to create center marks. Use a drill press and the 3/8-inch brad-point drill bit to make holes at marked center points.

Most of this type of tile has a rubber backing cushion. On the ones I used, it was firmly bonded, so I left it in place. It is a nice surface to trim on. A dampened pot rim adheres nicely to the surface. I have noted that with cheaper brands, the backing has not adhered as well, in which case I pull it off. Now it’s time to get busy and throw pots.
A note on price—commercial plastic bats of a similar size cost around $24. Luxury laminate planks run from $3–7 per square foot. So, that is the cost of making each bat, unless you are using leftover scrap material. You might also be able to find a bargain at a flooring warehouse on open-box or discontinued tile.

