Looking for some awesome ceramic decoration ideas? Custom stencils for ceramics are a great way to go and there are a lot of different ways to use them.
In this post, an excerpt from Pottery Making Illustrated archive, Lindsay Rogers explains how she makes her custom stencils for pottery–or as she calls them “stickers”–using masking tape and parchment paper.
Decorating the Plate
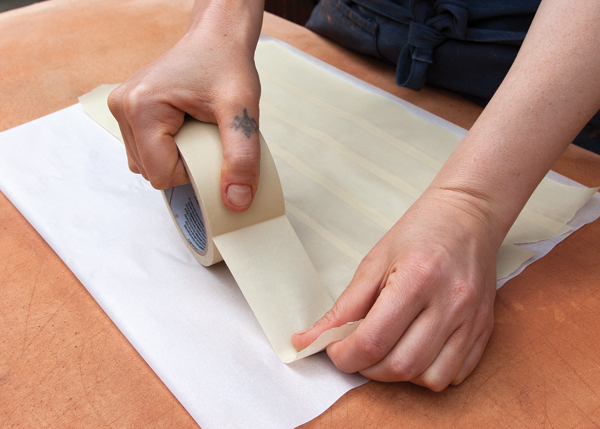
After trimming, I put my plates through the first of two bisque firings to cone 04. Once out of the kiln, I use a white porcelain bisque slip as a point of contrast to the deep brown clay. Once my slip is mixed up to a thin, skim-milk consistency it’s time to make some custom stickers! The stickers act as a resist to the slip (much like wax or latex resist) but have the potential to leave crisp, stencil-like edges. To make your own custom stickers use a large sheet of parchment paper as your backing. Next, lay down overlapping rows of masking tape until you have a solid sheet of tape (1). At this point you can sketch on the tape or simply cut the sticker in to whatever shape you want.
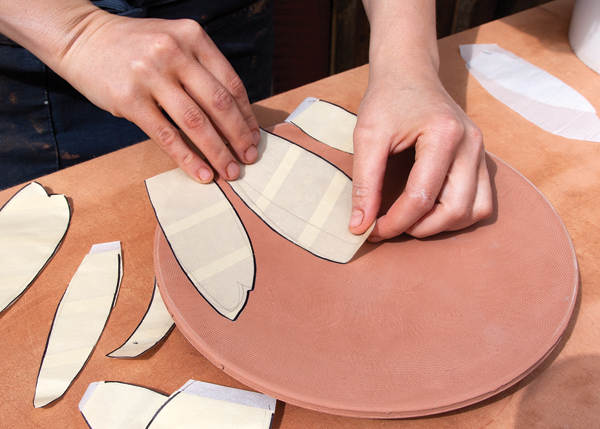
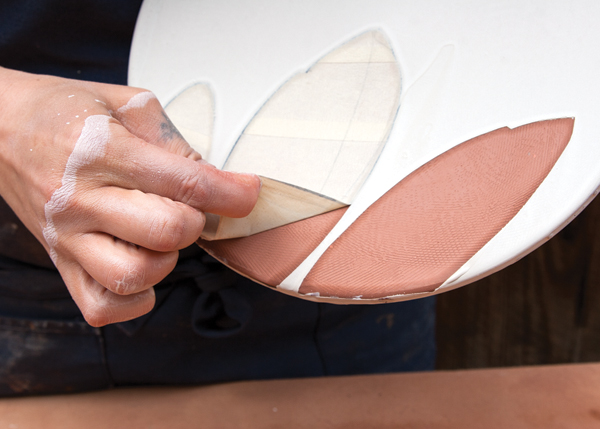
Play around with the composition of the cut stickers and use them to separate the space of the plate. Once your composition is set, peel off the parchment paper backing and affix the sticker to the surface of the plate (2). Compress with a soft rib to get a good seal.

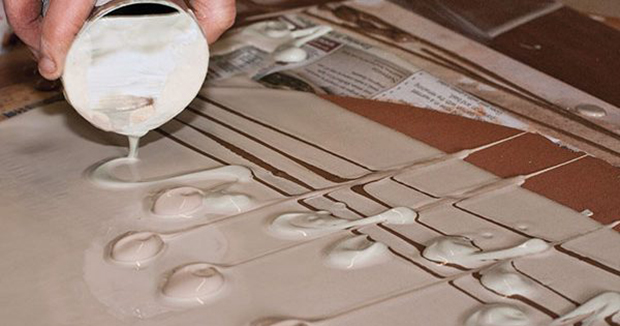
Applying the Slip
After the sticker is well adhered you’re ready to apply the slip. Pick up the plate by the foot and hold it upright over a wide bucket. Use a spouted vessel to pour slip across the surface of the plate, allowing the excess to fall into the bucket (3). To create a layered look, pour 3–4 coats of slip over the plate unevenly. Once the slip is dry, remove the sticker to reveal the clay below (4). With a damp sponge, clean up any edges that need refining.