
Slab built mugs can be lovely to look at and a pleasure to use. And yet, making a well-crafted slab mug is a simple process.
The basic technique for making slab mugs is the simple cylinder mug. Once you know how to make a cylinder mug, you can build on this and make a whole range of shapes to suit your taste.
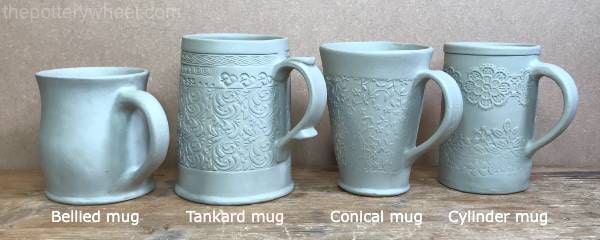
So, I’m going to start by showing you how I make a simple cylinder mug. Then I’ll outline how I adapt this method to make 3 other types of slab-built mugs.
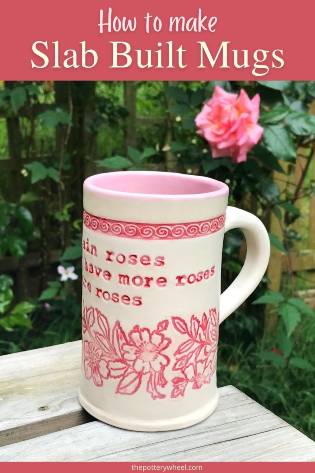
These are the 4 different styles that I will cover.
You can use these links below to jump to a particular section straight away if you’d like.
Some things you will need:
Making a Slab Built Cylinder Mug
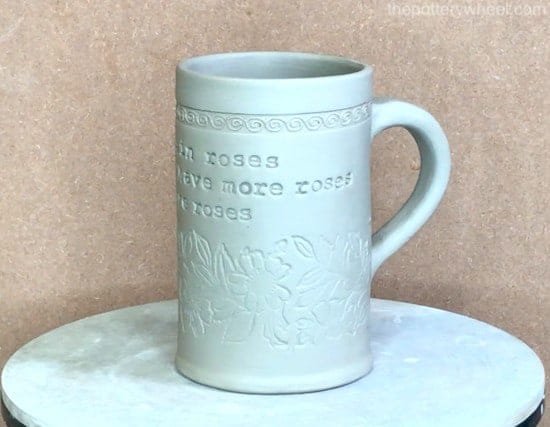
Making a slab built cylinder mug is a simple process. These are the steps that I took to make this slab mug…
Step 1: Rolling the Slab
When you are making a slab of clay, you can simply take a rolling pin and a ball of clay and start rolling. This can work.
However, chances are you will end up with a slab of clay that is thick in some parts and thinner in others. Plus, it can be hard to gauge exactly how thick or thin to roll your clay out.
An easier way to get a nice even slab of a particular thickness is to use roller guides. These are wooden strips that you put on either side of your piece of clay as you roll. You can buy roller guides with different thicknesses. I like to use guides that are 5mm thick for slab built mugs.
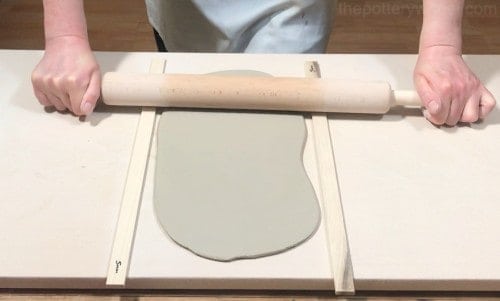
The guides stop you from rolling the clay for your slab built mugs out too thin. And they also give you a nice even slab, as they stop you from putting more pressure on the clay in some areas than others.
Tip:
Roll your clay out on a piece of texture-free fabric like an old bedsheet, or a piece of canvas. This will prevent your slab from sticking to your worktop.
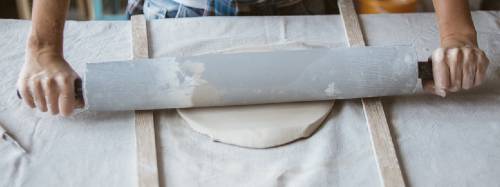
However, sometimes the fabric can get a bit creased and baggy as you roll the slab. If the material creases up underneath your slab, you will get an impression of the crease on the underside of your clay.
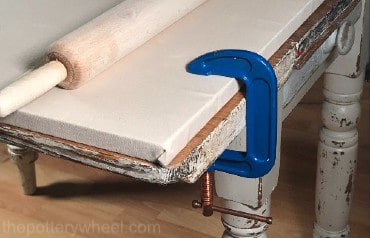
If you can, it’s best to stretch a bit of canvas over a piece of wooden board. This will stop your fabric from stretching and wrinkling as you roll. To attach the canvas, simply use a staple gun to staple the canvas all the way around the underside of the board.
It can help to put some heavy-duty tape around the edge of the canvas to cover the staples. This will stop the staples from scratching the work surface you put your rolling board on.
This is the topside and underside of my clay rolling board. It’s not pretty to look at underneath, but it does the job!
In addition to this, I clamp my board to my worktop to stop the board from moving about whilst I’m rolling the clay.
An Important Tip about Rolling Clay Slabs
When you are rolling the clay, roll it in on one side a few times. Then carefully lift the slab up, turn it over and roll it on the other side a few times. Repeating this process will help to prevent the slab from sticking to your surface.
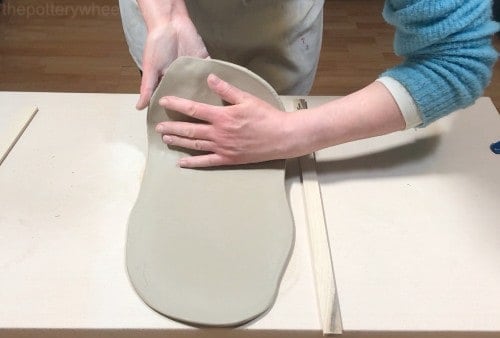
Also, when you lift the clay, change the direction that you place the slab on the surface. Then roll the clay in a different direction a few times.
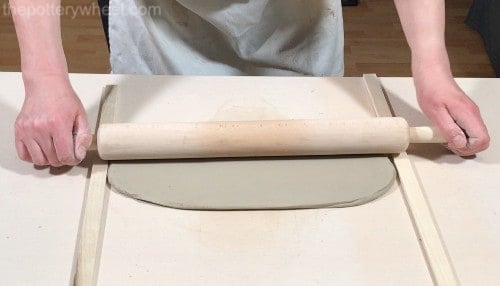
As you roll your clay it is being stretched which puts the clay under quite a bit of stress. When you change the orientation of the clay you prevent it from being stretched too much in one direction and put it under less stress.
Step 2: Compressing the Clay
Once I have rolled out the clay, I run a soft rubber rib (also known as a kidney) over the surface of the clay.
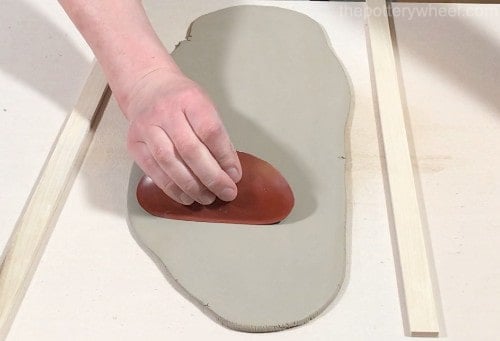
This removes any texture that the slab might have picked up from your work surface. It also compresses the clay and helps to align the clay particles. This makes the clay slab stronger as it dries and reduces the chance that your piece will crack or warp.
Compress one side, then carefully lift your slab, turn it over and compress the other side.
Step 3: Cutting Out the Slab
Once you have rolled out your clay, you can cut out the slab that is going to be the walls of your mug.
If you want your slab built mugs to have a nice organic relaxed style, then you can put a ruler on your slab and simply cut out a rectangular section of clay.
However, if you want your mug to be a particular size and shape, it helps to use a template. It’s easy to make templates for your slab built mugs. And if you’d like to know more about how I make these, you can check out my article here.
I made this cylinder mug with the template next to it…
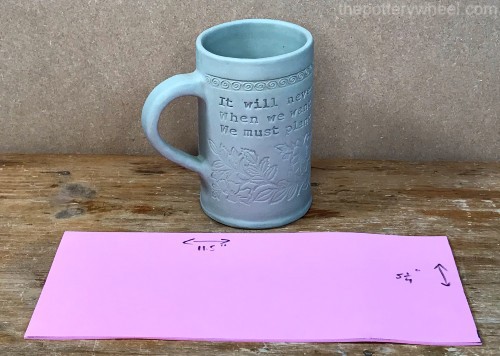
This particular template is made out of craft foam and its dimensions are 11.5” by 5.25”. But you can adjust these measurements to suit your style.
Simply place your template on the slab and cut around it using a clay knife. It’s important to hold the knife at a 90-degree angle to the table, so you get a nice square edge on your slab.
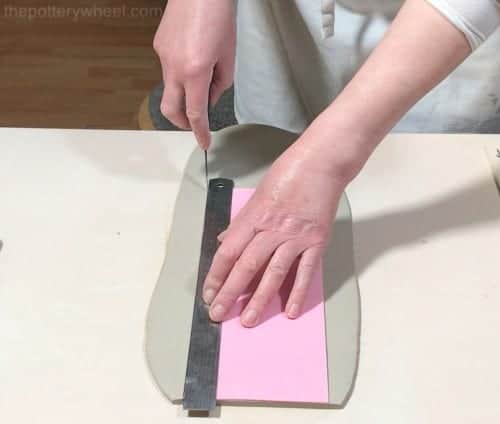
Also, I cut my straight-sided templates out using a metal ruler to make the cut edge as straight as possible.
Step 4: Smoothing the Rim
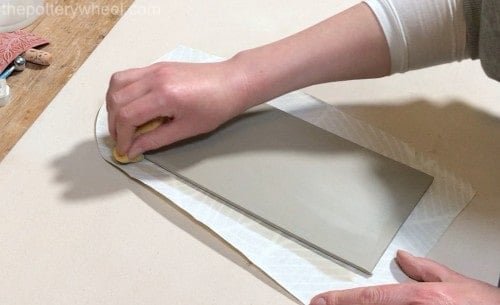
Once I have cut out the slab, I smooth the top edge of the clay. This is so that the rim that you drink out of is nice, rounded, and comfortable.
I smooth it down using a damp sponge. Simply run the sponge over the rim a few times, then turn the slab over and repeat the process on the other side.
Step 5: Beveling the Edges
To make sure that the slab joins together very securely, I bevel the two edges that will meet. “Beveling” refers to when you cut an edge at an angle so that it’s no longer at a square 90 degrees.
You can bevel your edges by holding a clay knife at a 45-degree angle to the table. Then run the angled knife down the edges of the slab that you intend to join. Bevel one edge, then lift your slab and turn it over and bevel the adjacent edge.
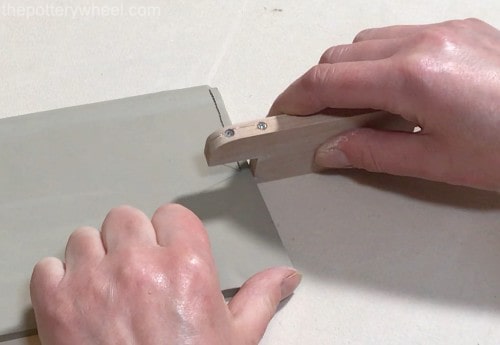
An easy way to bevel edges accurately is to use a ‘clay bevel cutter’. These are inexpensive little gadgets that are definitely worth buying. You can pick one up on Amazon here.
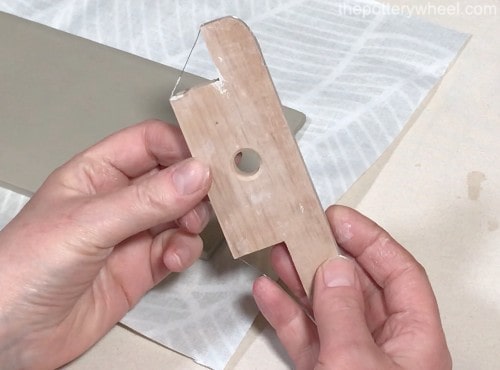
You pull the wired edge down your clay slab. This trims off a little clay at the edge, creating a nice neat beveled edge.
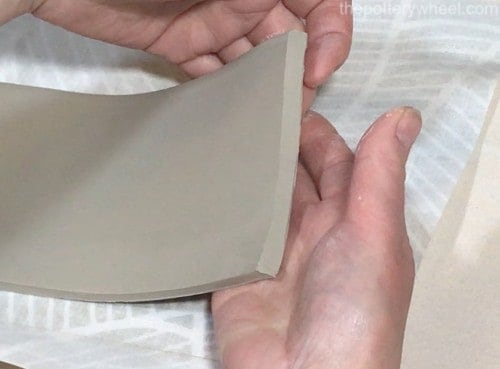
The benefit of beveling the edges is that you create a bit of overlap when you join your clay slab up. This will create a stronger bond with the clay, and reduce the chance that the seam will crack or open up.
I then cover the slab with some saran wrap and leave it overnight. The plastic stops it from drying out too much. However, even under the plastic cover, it will lose some moisture.
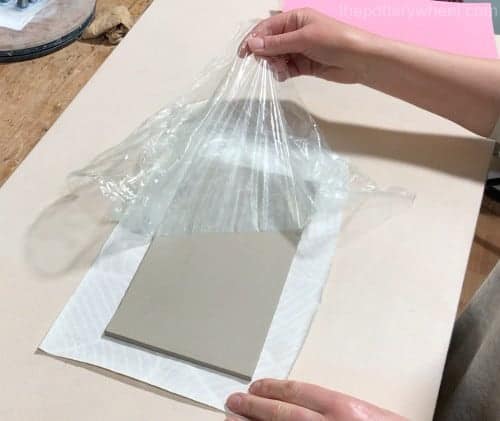
This will allow the clay to firm up so that it’s easier to handle and work with the next day. If the clay slab is very soft, it will be sticky and floppy, and hard to shape.
Step 5: Making a Textured or Smooth Slab Mug?
You can leave the surface of your slab smooth, or you can add some texture. Smooth-surfaced slab built mugs are lovely. Equally, creating a texture can add some individuality and design flair to your mug too. It’s really up to you.
There are a number of ways you can add texture to slab built mugs. With this mug, I used a selection of different tools to create a surface design. You can experiment with different texturing techniques to create a look that you like.
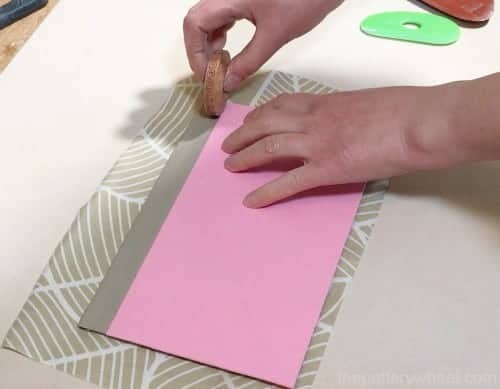
To create this mug, I started off my texture using a finger roller. Finger rollers are great because you can just pinch them between your finger and thumb and roll a texture into your slab. You can find finger rollers on Amazon here.
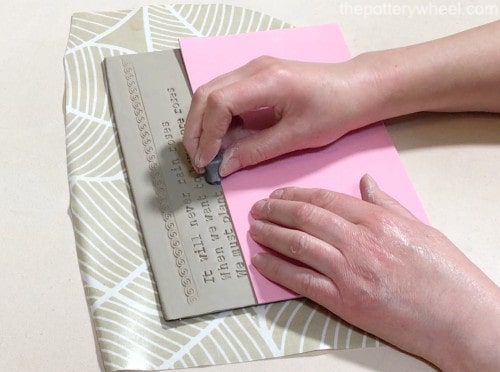
I then imprinted some lettering into the clay using clay letter stamps. These stamps are by Relyef Pottery Tools and are really lovely to use.
Finally, I used a textured rubber clay mat to add a floral pattern to the clay.
These rubber clay mats by Mayco are great because you can use them in lots of different ways. For example, they can be used to apply underglaze designs to pots. Or equally, they can be used to add texture to a slab.
I position the clay mat onto the slab and press it down onto the clay with my thumb and finger.
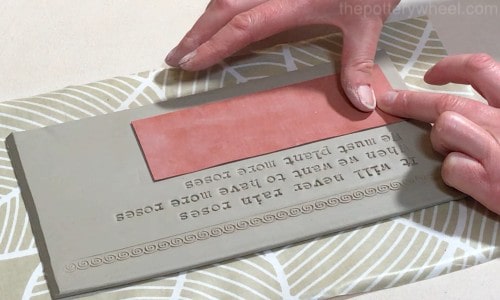
When I peel the mat off, it has left a floral impression on the clay.
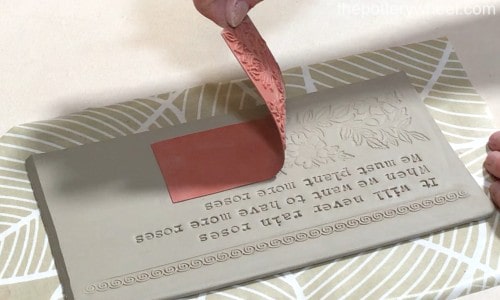
This mat wasn’t quite long enough to cover the whole length of the slab, so I lined it up a second time and repeated the process.
Step 7: Shaping and Joining the Slab
Using a serrated rib tool (or a kitchen fork), score into the beveled edges of the slab. This creates a rough texture on the clay which will help the seam of the mug bond together.
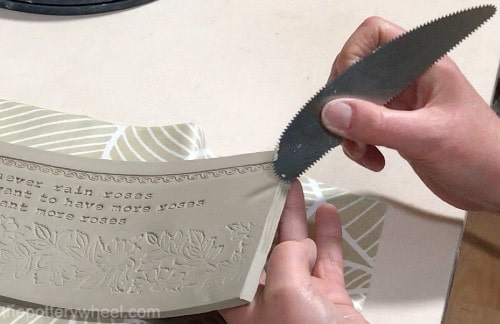
Once I have scored the edges, I carefully pick the slab up and place it on its bottom edge. Gently curve the slab round into a cylinder shape.
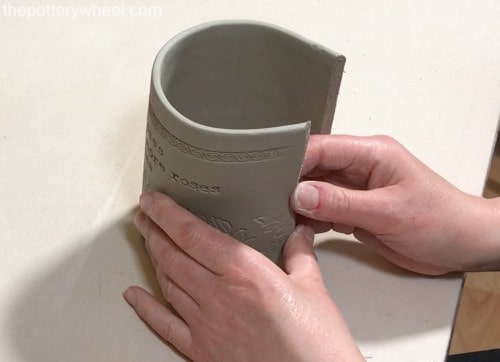
When the beveled edges are almost touching, I add some slip to the scored surfaces. Slip is clay that has been dissolved in water so that the clay becomes liquid.
When you apply slip to the scored edge, it mingles with the clay on your slab. This makes the edge of the slab sticky. So, when you press the edges together, they will knit together and create a strong bond.
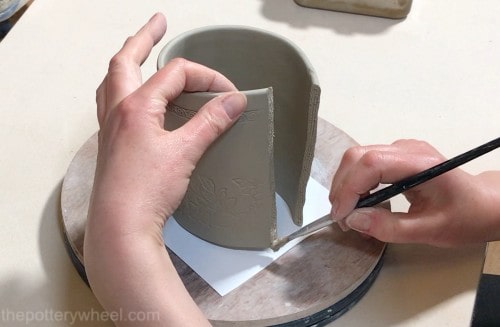
Once I have applied some slip to both edges with a brush, I position them so that they are lined up together.
I put one hand inside the cylinder to support the join. Then I use the fingers from the other hand to press the edges together to make a joined seam.
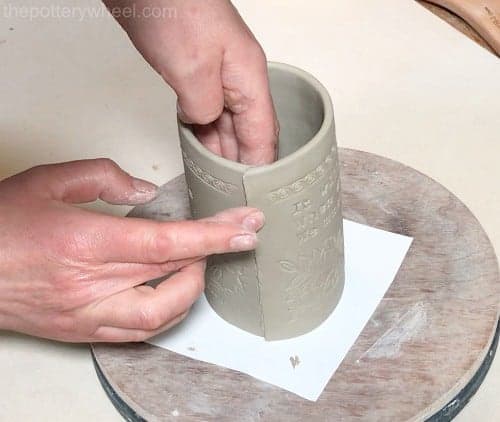
As I press the edges together, some slip squeezes out. The slip can just be wiped away gently with a finger.
I repeat the process of pressing the seam together and wiping away excess slip until the seam is the same thickness as the other parts of the cylinder.
Step 8: Blending the Seam
Once the clay slab has been joined at the edge, I like to blend the clay in so that it’s a smooth join. Blending the seam gives a neat, well-crafted finish, and also strengthens the join.
I find the easiest way to blend the seam on the inside of the mug, is to reach inside with a wooden modeling tool. Using a swiping motion with the modeling tool, you can smooth out the area where the slab has been joined.
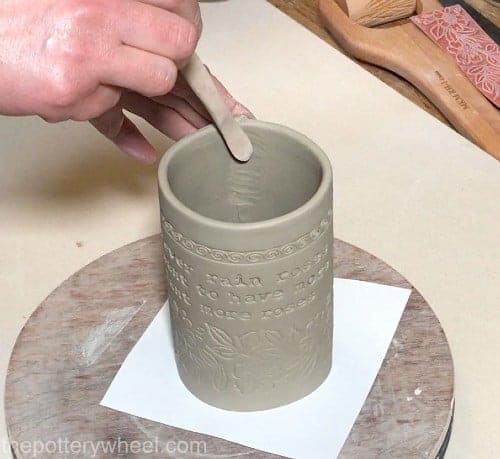
The modeling tool can leave some marks behind. I smooth those out using a plastic potter’s tool called a platter tool. It’s called a platter tool because it’s mainly used for making platters.
But it’s handy to reach inside a long thin cylinder and smooth away the marks left from blending with the modeling tool.
To blend the seam on the outside, I simply run a rubber rib over the join a few times.
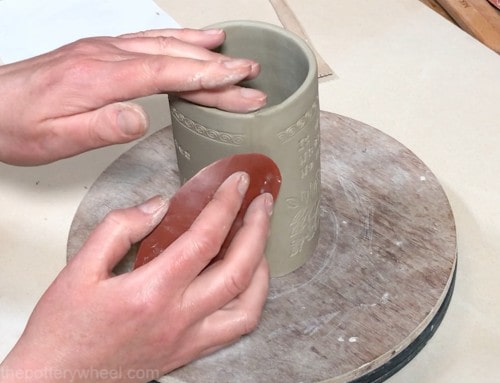
Step 9: Making the Base
There are a few ways to make a round base for slab built mugs. This is the method that I prefer.
First, I slide an old smooth beaker into the base of the cylinder to make sure that the base is nice and round.
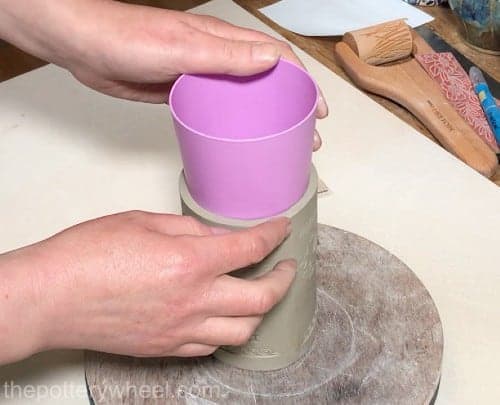
Then I remove the beaker and place the base of the mug on a sheet of paper. Carefully draw around the base with a pencil. This will create a circle on the paper that matches the shape of your base. Cut this circle out with scissors.
At this point, you could simply use this paper circle as a template to cut out a clay disc from a slab of clay. However, I like to make sure that the base of my mug is perfectly round. So, I take the following extra steps.
Creating a Perfectly Round Base
I fold the paper circle in half and then fold it again into a quarter. Then I unfold the paper and I use the point at which the folded lines cross over to pinpoint the center of the circle.
I then set a compass so that it’s the same distance from the center of the paper circle to the edge. This is the radius of the base of your mug.
With the compass set at this measurement, I draw a perfectly round circle on another piece of paper. This circle is the same size as the base of my mug. However, it doesn’t have any bumps or irregularities that you might find on the base of a hand-built cylinder.
I then cut out this circle of paper. You can either use this paper circle as a template, or you can trace around it on craft foam and cut it out. This gives you a nice craft foam template that will last for a long time.
You can then use this circular shaped template to cut out a disc of clay from a clay slab. This should fit the base of your mug perfectly.
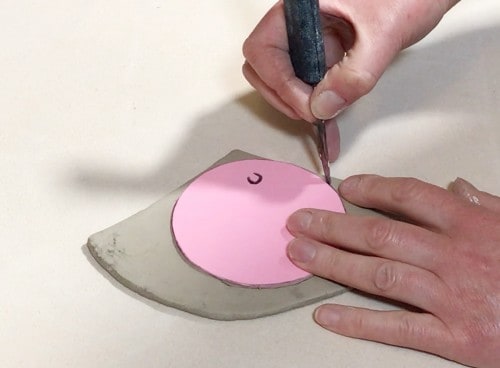
In fact, I find that the template is usually a millimeter wider than the base of the mug. This works to our advantage because it gives us just a little extra clay to blend into the base of the cylinder.
Step 10: Attaching the Base
Score the edge of the base and the bottom edge of the mug, and apply some slip to both scored surfaces.
Then lift the mug up and position it on top of the base. I find it easier to line the mug up correctly on the base if I lower the mug onto the base.
If I place the base on top of the mug, it’s harder to see if they are lined up properly. Whereas, if you lower the base onto the mug, you can wiggle the position of the mug and adjust it a little if need be.
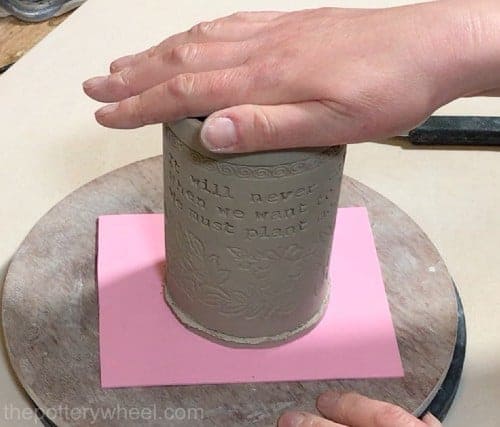
Once the mug is in the right place, I use my finger to press the base onto the bottom edge of the mug.
Wipe away any slip that has squeezed out with your finger. Then you can run your finger around the base to create a nice smooth foot ring.
Making Sure the Base Stays On
I also take one more step to ensure that the base is firmly attached to the mug. Roll out a thin coil of clay about 3mm thick. Drape this coil around the inside of the mug so that the coil is positioned where the mug meets the base.
Then press the coil into the join. I normally use a ball stylus tool to press the coil into the join.
This is because it can be hard to fit your hand and fingers all the way down into the bottom of the mug.
These stylus tools are inexpensive to buy and definitely worth the investment. You can check them out here if you’d like to purchase one.
If aren’t able to buy one, you could always use the rounded end on the handle of a wooden spoon. This won’t be quite as smooth as a stylus tool, but it will do the job. Run the ball tool over the surface of the coil until the coil has been blended completely into the corner and onto the sides and base.
Step 11: Pulling a Handle
There are a variety of ways of making a handle for a mug. In this article, I will cover my two favorite handle-making techniques. The first one I will cover is the process of ‘pulling a handle’. I’ll go over how to make a strap handle later on.
‘Pulling a handle’ really does involve pulling the clay into the handle shape that you want.
To pull a handle, I start off with a piece of clay that I have squeezed into the shape of a carrot or sweet potato!
Hold the clay carrot with your fingers in one hand, over a bucket or dish of water. Wet the palm and fingers on your other hand. Then run your wet hand down the thin end of the carrot.
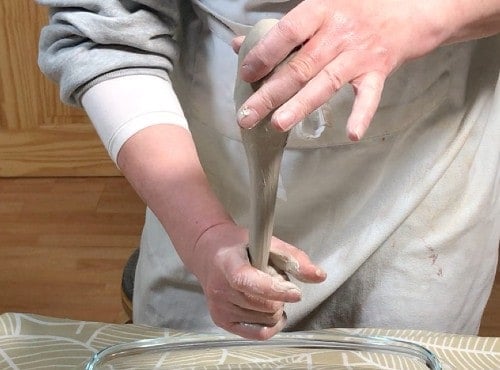
Repeat this process of pulling your hand down over the clay, squeezing gently as you pull. As you pull, the tube of clay that hangs down will get a little longer.
Each time you pull the clay, turn the carrot around in your supporting hand. By turning the clay, you are ensuring that the clay carrot gets equal pressure on all sides. The equal pressure means that the coil of clay dangling down will be a nice even shaped circle.
Shaping and Pinching Off the Handle
Once the coil is about the right length for a handle, you can start to flatten it out a bit. I do this by running the coil between my finger and thumb a few times. This will flatten the coil a little, making the handle more comfortable to hold when it’s attached to the mug.
You can check to see if the handle is long enough by draping it over one hand so it makes a curved shape.
Pinch the clay coil off and position it on a wooden pottery bat (or an old chopping board). It’s best to curve the clay into a handle shape when you place it on the board.
At this point, the clay will be too soft and floppy to attach to the mug. So, let the handle firm up for a while. You want the clay to be soft leather hard when you attach it to the mug.
This means that the handle is firm enough to pick up without losing its shape but soft enough to bend a little if you need it to.
Step 12: Attaching the Handle
When the handle has firmed up a little, I trim it to length. Trimming the handle is important as you want it to be in proportion with the mug and also feel comfortable to use.
To trim it to length, I hold it up against the mug and curl my fingers around the handle as if I’m holding the mug.
I then use my thumbnail on my other hand to make a small mark on the handle where I want to trim the ends.
Then place the handle on your work surface, and trim both ends of the handle at the points you have marked with your nail.
Hold the trimmed handle up against the mug and decide where you want the ends to attach. It’s best to position the handle over the seam, as this will help to conceal any unevenness around the seam area.
Carefully mark where you want the handle to be attached using a pointed modeling tool or a needle tool.
Slip and Score the Handle
Then score into the surface of the mug at the two points where you want to attach the handle. And also score both ends of the handle.
Apply a generous amount of slip to both surfaces, and position the handle on the mug.
It’s important to make a firm bond between the handle and the mug. Put one hand inside of the mug and put the tips of your fingers on the inside wall of the mug. Then press the handle onto the outside of the mug surface with your other hand.
When it feels like both ends of the mug are firmly attached, you can wipe away excess slip from the join with a soft brush.
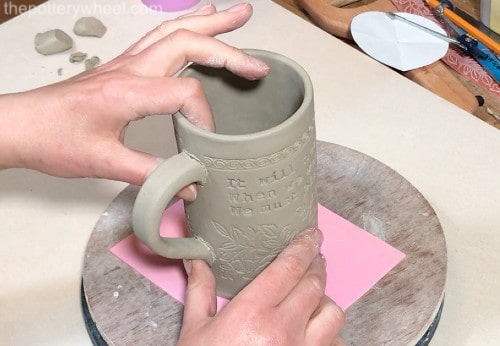
This may have created a strong enough bond between handle and mug. However, to be on the safe side, I normally blend a small thin coil onto the upper side of the point at which the handle meets the mug.
Step 13: Finishing Touches
Once the handle has been attached, I will often go over the join and the surface of the mug with a damp chamois leather.
This will wipe away any excess slip that is left on the surface of the mug and tidy up any stray tool marks or fingerprints.
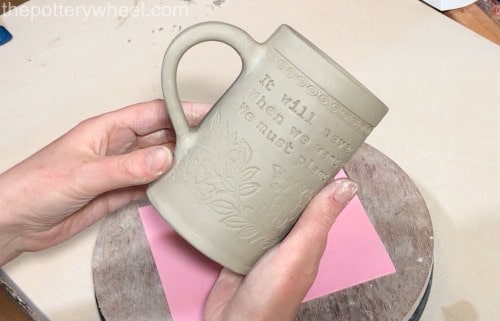
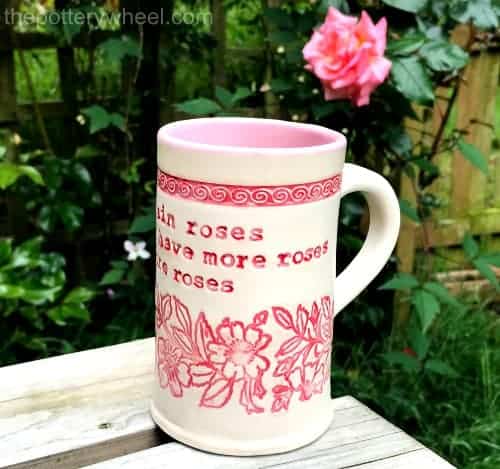
When the mug has been dried and bisque fired, it’s ready to be glazed. Here is the finished glazed mug…
Making a Slab Built Conical Mug
A ‘conical shaped’ mug is just another way of saying ‘cone shaped’, with one end being narrower than the other.
Conical mugs are built in the same way that cylinder mugs are made as outlined above, but there are one or two differences.
The key difference is that the conical mug needs a different shaped template. Not surprisingly, the conical mug needs a cone-shaped template like this…
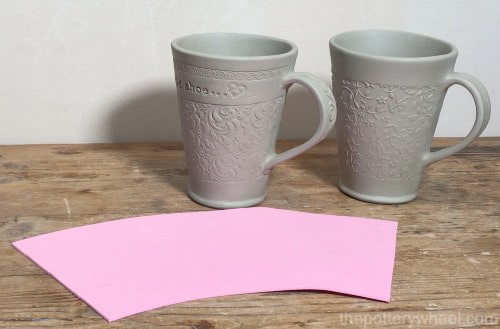
The conical template is the shape of an arc or rainbow. And the amount of curve on the arc will determine how much of an angle there will be on the mug.
A slight curve on the arc will make a gradual slope on the mug. And a very curved arc will create a wide-shaped mug, more like a teacup.
Making Conical Shaped Templates
It would be difficult to get an evenly shaped and nicely proportioned mug by drawing a conical shaped template freehand.
However, there are some very simple methods you can follow to create your own conical templates. Here is a link to a step-by-step guide that I wrote, with pictures and a video on how to make cone-shaped templates.
Making Your Cone Shaped Mug
Once you have your conical template, you can use this to cut out your cone-shaped slab of clay.
The clay can then be decorated and assembled as outlined above.
There is however one more difference between making a straight cylinder mug and a cone-shaped mug. And that is to do with adding texture and design to your mug.
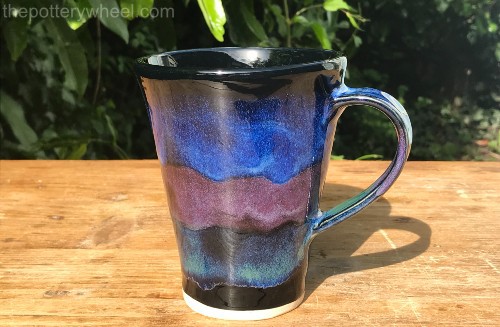
You may want to leave the surface of your conical mug smooth and decorate it later with glaze. This can look lovely. My favorite example is this smooth conical mug that I glazed with nice fluid glazes in the Potter’s Choice range by Amaco.
However, if you do want to add texture to the clay, here are some things that you need to consider…
Adding Texture to a Conical Shaped Mug
The main thing to remember when you are adding texture to your conical mug is that you need to follow the curve of the slab.
So, for example, you may want to add a textured line that runs parallel to the rim of your mug. When you’re adding this line, you need to add the texture in a curved arc too.
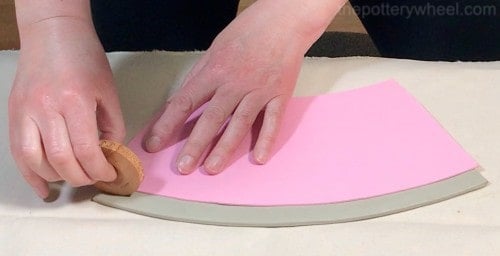
I find the easiest way to do this is to use the template as a guide when adding the texture. I simply put the template on the slab and follow the curve of the template as I go.
This is how I added a nice curved texture to this mug using a finger roller.
I also use the conical template as a guide to draw a faint line on the slab. I use this light line as a guide for adding text to the mug in a nice neat row.
If I hadn’t used the template as a guide for drawing the line, chances are the text would have been wonky and spoilt the overall impression of the lettering.
Another great way to add texture to slab built mugs is to use a texture roller. Texture rollers come in all shapes and sizes with a huge range of patterns engraved into them.
When I’m using a texture roller on a conical mug, I twist my hand a little as I roll so that the roller follows the curve of the mug.
The trick to using a texture roller is to try to apply even pressure as you roll. This will help you achieve a uniform texture over the surface of the mug.
Tidying Up the Slab
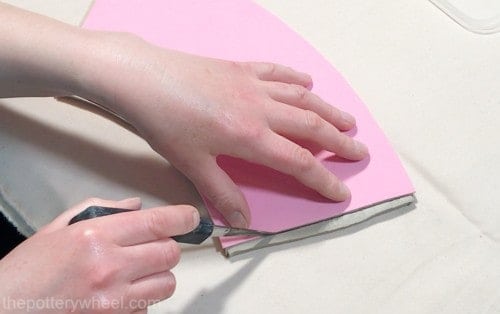
You might notice in the last image above that adding texture using a roller can stretch the slab out a little bit. So, after I’ve used the rollers, I put the template back in position over the slab and see if the edges of the slab need to be trimmed to shape again.
If the slab has become a bit stretched by the roller, I use my craft knife to trim the edges. I then bevel the edges of the slab once the texturing work has been done.
Strap Handles
I described above how I make pulled handles. However, a lovely alternative when making slab built mugs is to make a strap handle. And this is how I make strap handles for my slab mugs.
I use one of my roller guides to cut a straight line in a slab of clay. Usually, I use an offcut of the slab I made earlier to make the body of the mug.
I then cut a second straight line in the clay that runs parallel to the first line. You can choose how wide or narrow you want your strap handle to be.
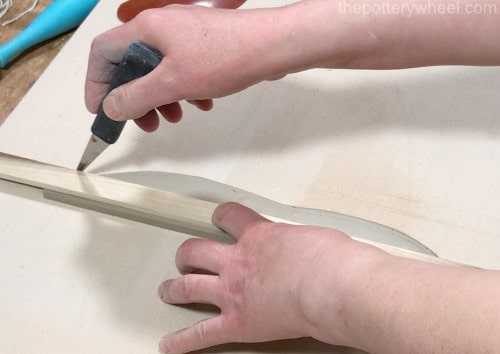
I like to make mine just a little wider than the roller guide, so I position the guide just a little to the side of the first line I cut.
You can also make your strap handle into a tapered shape so that one end is a little narrower than the other. The handle in this example is not tapered.
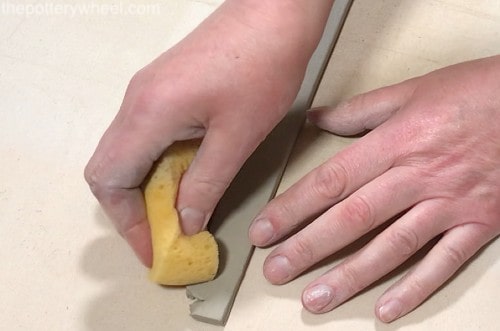
When I’ve cut the strap I round the edges with a damp sponge. This will make the handle neater and more comfortable to hold once it’s been attached. Round the edges on one side, then turn the strap over and round off the edges on the other side too.
Adding Texture to a Strap Handle
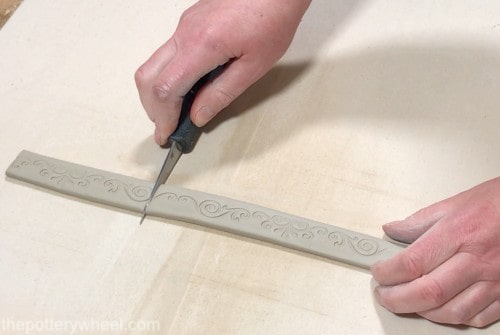
The strap handle can be added to the mug as a smooth strip of clay. However, you can also add some texture to the handle that compliments the texture of the mug. A simple and attractive way to add this kind of detail to a handle is to use a texture roller made by Xiem.
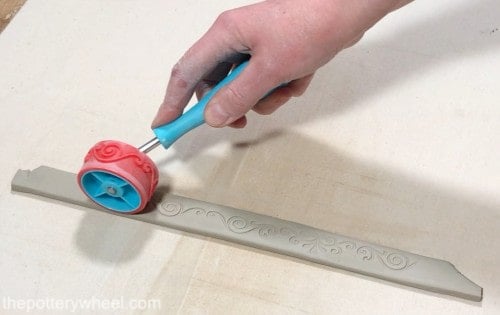
Once I’ve added texture to the handle, I trim the ends to cut the handle to length.
It’s important to curve the handle into the correct shape when it’s wet. The reason for this is that once the clay firms up and dries a little, it is harder to bend it into shape without it cracking.
You need to attach the handle whilst the clay is still moist but not floppy and wet. Let it firm up for a few hours and then check to see if it’s ready to be attached.
The process of attaching a strap handle is the same as attaching a pulled handle. That is, you cut the handle to length then slip and score the mug and the ends of the handle. Press the handle into place on the mug. And then for good measure, you can blend in a small coil of clay to the upper side of the join. For a full account of attaching the handle, have a look here at the description in this article earlier on.
The Finished Conical Mug
Once I have added the handle, I give the mug a once-over to see if any details need to be tidied up.
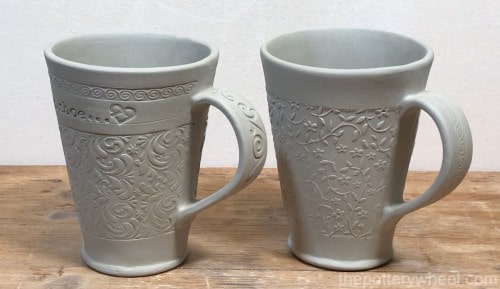
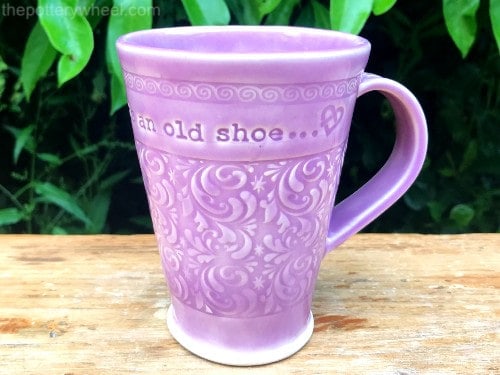
After that, the mug is ready to be dried, fired, and glazed. I glazed these slab built mugs with Amaco Celadon glazes. These glazes are semi-transparent and move a little when they are fired. So, they show up on textured surfaces on pottery very nicely. These are the glazes that I used on this mug.
Tankard Shape Slab Built Mugs
There are different styles of tankard mugs, but the ones that I like most are a bit wider at the base of the mug than they are at the rim.
A tankard mug is another style of conical mug. The main difference is that the cone is positioned so that the wider rim is at the bottom of the mug. Here is an example of a tankard mug with the template that I made for the mug…
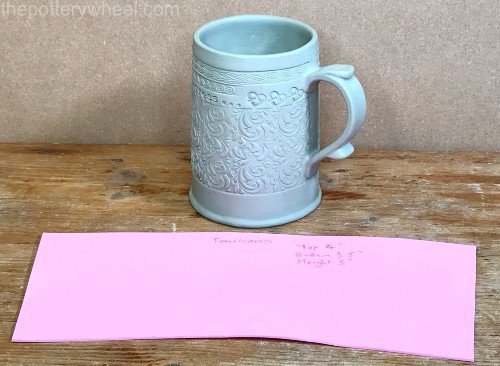
Another difference is that the arc of the template is likely to be a gentler curve than a standard conical mug. This is because, if the rim is much narrower than the base, your tankard would be awkward to drink out of.
As I mentioned earlier, if you’d like to know how I made the template for this mug, check out my article on making slab pottery mug templates here.
Similar to the conical mug, I make the tankard mugs in the same way that I make standard cylinder slab built mugs. The difference lies in the shape and orientation of the template. And on a few details that I add to the mug handle once the handle has been attached.
In particular, you will notice on this handle that I’ve added a thumb and pinky rest on the handle.
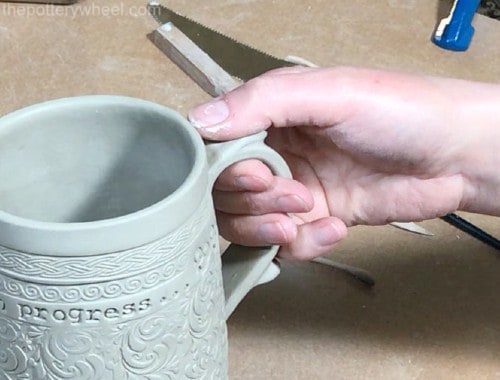
This gives the handle that nice rustic, old-world look. And it also makes it comfortable for the person holding the handle.
Adding a Thumb and Pinky Rest to the Handle
Thumb and pinky rests come in all sorts of different shapes and sizes. The way that I make mine is I shape a piece of clay about the size of a small grape into a little wedge.
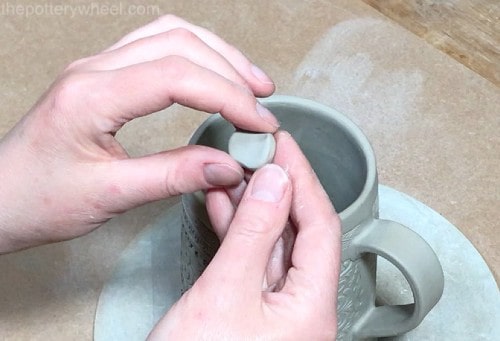
I then line the wedge up on the handle to see where it would make a comfortable resting spot for the thumb or pinky. Once I’ve decided where I’m going to position the rest, I make a few marks on the handle with a needle tool or some other fine modeling tool.
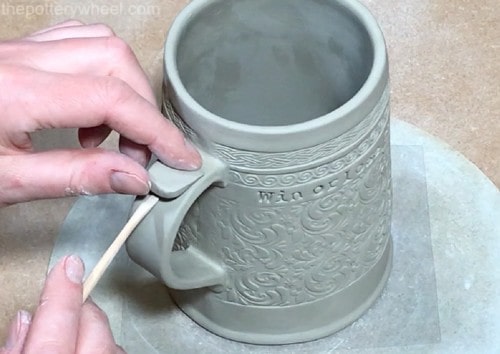
Lift the wedge off the handle and score onto its underside. Then score onto the handle where the wedge will be attached. Apply slip to both scored surfaces, and then press the wedge into position.
Once the wedge is attached, I wipe away any excess slip and I blend the thin end of the wedge onto the handle.
Repeat this process to add the pinky rest too. Once I have added both, I use a small piece of damp chamois leather to tidy up the surface of the clay.
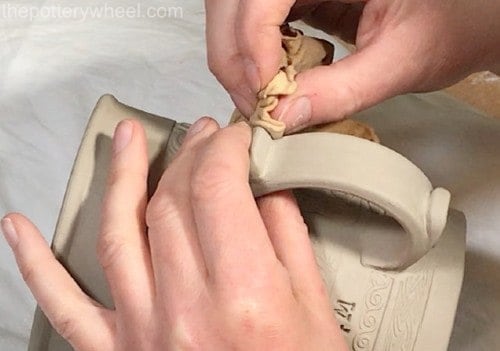
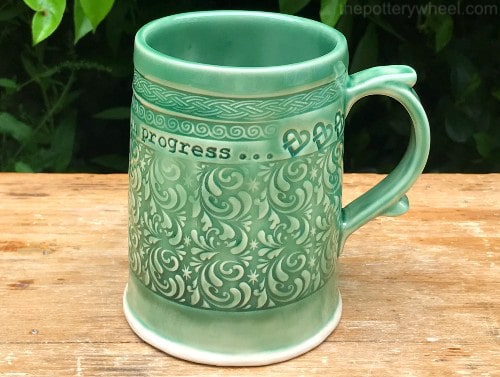
The tankard is now ready to be dried, fire, and glazed. Here’s the glaze I used on the tankard mug below.
Bellied Slab Built Mugs
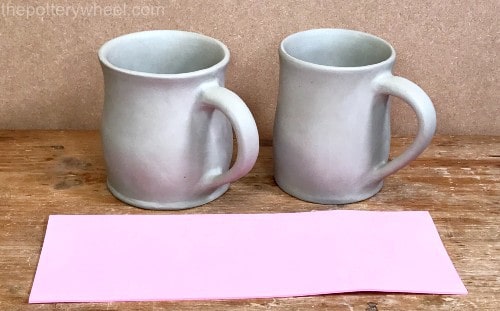
One last variation of this technique is bellied slab built mugs. The bellied mug, as the name suggests, is a mug with a bit of a belly on it. In fact, in pottery when we use our hands or a tool to push the clay out from a straight cylinder to a curved shape, it’s sometimes called ‘bellying out’.
These curved mugs were made by bellying out a straight cylinder slab mug.
How to Make a Bellied Slab Mug
Make a straight cylinder-shaped mug, as described in the steps outlined above.
After you have attached the handle and when the clay is still a bit workable you can begin to belly the sides of the mug.
Before you do this, it’s important to wait until the seams of the slab mug are firmly joined. If you start stretching the clay when the seams are very fresh, you might split the mug at the seam or around the base.
I would normally cover the mug with a bit of plastic and leave it to sit for a while after I’ve attached the handle. This will give it a chance to set up and be strong enough to stand a bit of stretching.
Bellying the Mug
I wet the tips of my fingers a little, on one hand, and put them inside the mug. I use the other hand to support the outside of the mug.
Then I gently but firmly press the inside of the mug so that the clay walls begin to bulge outwards. The action that I use is a swiping action with my fingertips.
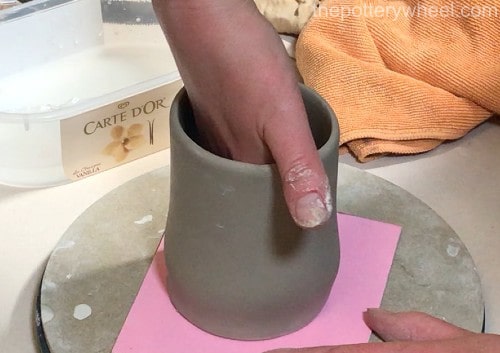
I’m aiming to stretch the clay just a little with each swipe. This ensures that the clay stretches gradually.
If you expect the clay to stretch too quickly there is a good chance the clay will crack or split. So, it’s best to stick to lots of gentle swipes rather than a few very forceful ones.
You can experiment with different ways of bellying out the mug. Potters sometimes use sponges to achieve this effect. They will run a small damp sponge around the inside surface of the mug. I’ve also heard of others that use tools, or even the back of a dessert spoon.
I prefer to use my fingers because I can feel what I’m doing with my fingers. But you can try out different methods and find out what feels most natural to you.
A Word on Cracks
You may find that the outside surface of the clay does crack a little as you do this. Don’t worry if this happens.
You can get rid of the cracks on your slab built mugs by running your thumb or a soft rubber kidney over the cracked surface and blending the clay in as you work.
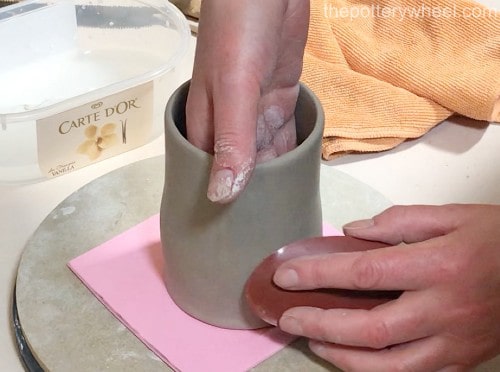
You’ll notice that this mug has a smooth surface. You can belly out a mug that has been texturized in one of the ways described above.
However, there is a greater chance of the clay cracking if it has a textured surface. And because of the texture, you can’t simply run your thumb over it to remove the crack.
A few cracks in a textured surface can look nice. And you may be aiming to create a very organic-looking pot that looks distressed or weathered.
In that case, provided the cracks aren’t too deep or significant you can leave the cracks as a design detail. However, if you don’t like a cracked or crazed surface, it’s best to belly out a smooth pot, so you can erase cracks as they appear with your thumb.
Adding a Few More Curves
Once you are happy with the bellied curve of the mug, you can also experiment a little with curving out the rim of the mug. This can complement the curve of the belly. I curve the lip by gently bending out the rim with the tips of my thumb and forefinger.
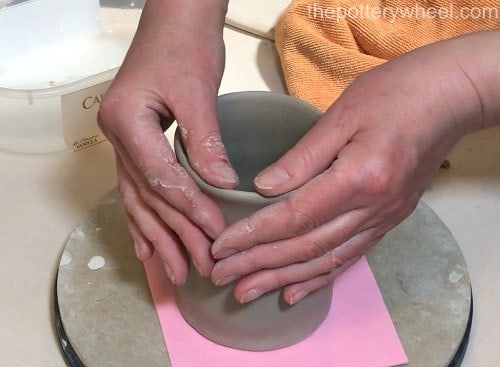
You can see here the difference between this mug when it was a straight cylinder and its curved appearance after it has been bellied out.
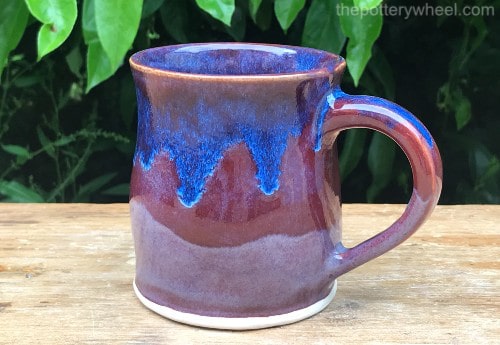
Here is this nice, bellied mug once it has been fired and glazed.
Final Thoughts
It’s fair to say that I have a bit of fixation with slab built mugs. They are one of my favorite things to make. I hope that this article has inspired you to give it a go and that you catch the slab mug bug too.
