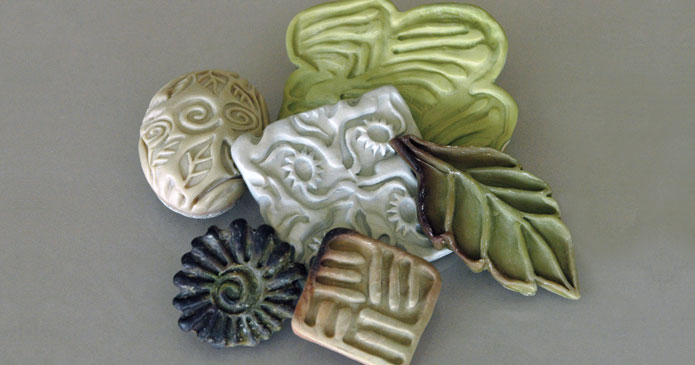

I saw Virginia Cartwright demonstrating at a Potters Council (now the International Ceramic Artists Network–ICAN) workshop a couple years back and one of the brilliant little nuggets of information that I came away with was the idea of making clay texture stamps out of polymer clay.
Virginia had an assortment of her lovely little homemade polymer clay stamps for sale at the workshop and I couldn’t resist purchasing a few to take home. And I plan to make some of my own one of these days. After today’s feature, you’ll be able to make them too. In today’s post, Virginia explains this process. – Jennifer Poellot Harnetty, editor
Stamps enhance your work by adding interesting textures to your pieces and depth to your glazes. For years, I carved stamps from small plaster blocks or leather-hard clay that was then bisque fired before use. I wanted a way to make stamps more quickly so I could share them with my students and workshop participants and found that polymer clay (available at craft stores) makes a clean, crisp impression that can be cured and ready for use in thirty minutes.
When making a stamp using stoneware, porcelain or any other type of regular ceramic clay, you need to let it dry and then bisque fire it before you can put it to use, which could take several days to a week. Polymer stamps, by comparison, are ready in about a half hour. You can then take those stamps, press them into another piece of polymer clay, and quickly get a negative version of your designs. Polymer clay does not crack or crumble as easily as stoneware or earthenware clays, and scraps can be easily recycled. Since it’s not water based, the clay doesn’t dry out. This property also makes polymer clay an ideal material for making impressions from a variety of objects, including antique furniture, kitchen tools, buttons, Indian wood blocks and tombstones. I keep some polymer clay in a plastic bag in my purse so that I can quickly capture a texture at any time!
There are several brands of polymer clay available (Sculpey, Fimo or Premo), all of which are good. Sculpey has a product called “Super Sculpey” which I use because it is a strong, shatter-resistant material. Super Sculpey is only available in a tan color, so I combine it with about 25% of another color of polymer clay if I want to change the color.
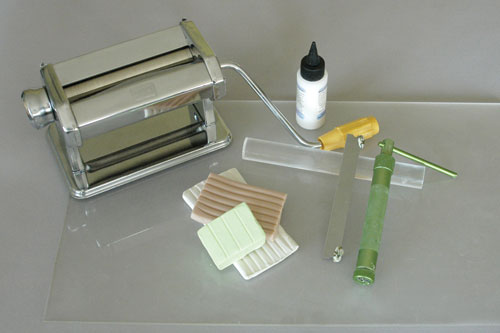
You’ll need a clean, non-porous surface to work on, and a Plexiglas roller made just for polymer. You can substitute this roller with an 8-inch piece of plastic pipe. You should also buy a 6-inch long cutting blade and an inexpensive pasta machine (both available at craft stores or garage sales). The pasta machine is used to soften the clay and to blend the colored clays together. If you’re just making a few stamps, you can use your hands and roll the clay into coils until it softens. I find it helpful to attach handles to the stamps. Buy a bottle of liquid polymer clay and use this as glue to attach the polymer handle to the top of the stamp.
Polymer clay stamps are best when used on slightly firm slabs of ceramic clay. If the stamp sticks to the clay during use, baby powder or cornstarch can be used as a release agent. These embellished slabs can be used to make handbuilt vessels and sculptures, or left flat for tile work.
The Process
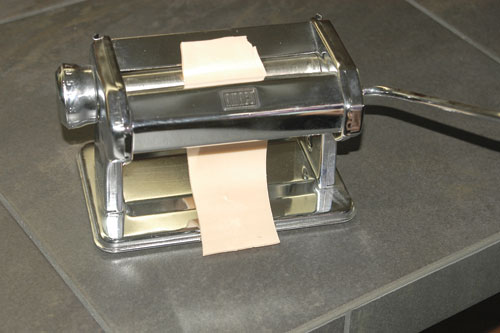
Condition the polymer clay by rolling it ten times through a pasta maker on the thickest setting (figure 1). If you do not have a pasta machine, manually roll the clay into coils in your hands. Your body heat will soften the clay. If you want to mix your own colors, make coils of two or three colors, roll them into one coil and twist the coil like a candy cane. Cut the twisted coil in half, join the two pieces and twist them again, repeating this process until the colors are blended.
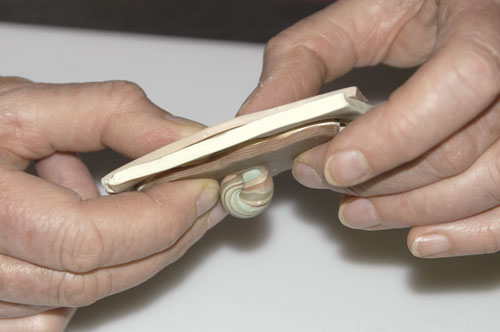
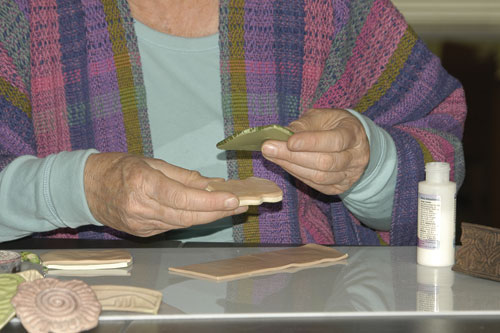
You can make stamps using several layers of polymer clay by first rolling it out into a slab that is about ¼ inch thick. Thin polymer clay slabs take a deeper, clearer impression than a thick one. Put a pinch of baby powder or cornstarch on one side of the clay. Next, press the clay (powder side down) on top of a textured object. Place the polymer clay over the texture and press it with your thumbs, rather than pressing the texture down onto the polymer clay (figure 2). Leave the polymer clay on the textured surface and add a second layer of Super Sculpey clay (figure 3). Press the layers again with your thumbs. Remove the clay and trim the edges.
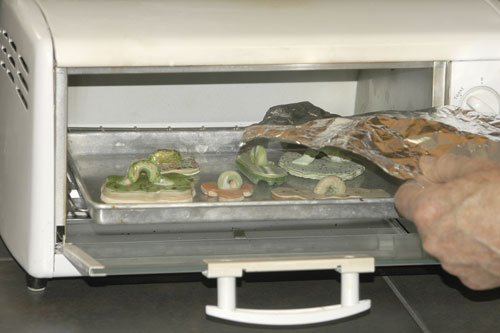
Bake the polymer in a small toaster oven, following the directions given on the package. Typically, it will bake at 275°F for fifteen minutes, though you may increase the time by five minutes if the stamps are very thick. Be careful not to overheat the polymer clay. You can cover your pieces with aluminum foil to prevent scorching and blistering (figure 4). If you smell a strong odor while cooking the stamps, it means that they are getting too hot. Turn off the oven, and ventilate the room. Finally, add a top decorative layer and a handle. I join everything together with a thin coat of liquid polymer clay and cure the piece again. The heat fuses the layers and handle together.
